
When Jo-Ann asked if I’d like to be a part of their Celebrate the Season Campaign, I jumped at the chance! I love creating holiday crafts and the kids get really excited about seeing the decorations.

Our neighborhood gets pretty crazy on Halloween and my husband does up the entire outside of the house. I had abolutely no decorations for the inside, though, so I decided to create some festive decor for the mantle and coffee table. My kids are 2 and 4 and don’t really like spooky, so I decided to play it safe and use candy corn as my inspiration. This table runner and bunting are super easy to make and customizable to any size table and mantle.

•••
Candy Corn Table Runner and Bunting Tutorial
(All amounts and measurements are for a table runner that is 17 1/2″x 40″ and bunting that is 6′ long. You can modify the patterns by adding more, or less, candy corn triangles.)

Materials Needed:
- 1/4 yard Keepsake Calico Lined Dot- White
- 1/4 yard Keepsake Calico Tonal Dots- Gold
- 1/2 yard Keepsake Calico Tonal Dots- Orange
- 1 1/4 yards Halloween Spooky Prints- Orange Dot on Black
- Craft Size Warm & White Batting
- 1/2″ black single fold bias tape
- Black Thread
- Fons & Porter Pyramid Ruler (you can also use the 60˚ angle on a quilter’s ruler, or print out this template).
All seam allowances are 1/4″
Step one: Cut fabrics
(Fold all fabrics in half, selvage to selvage. Tutorial assumes your fabric is 44″ wide. If your fabric is several inches narrower, you may need extra strips.)
White Fabric
– Cut 3 strips 2 1/2″ x 44″ for strip sets
Gold Fabric
– Cut 3 strips 2 1/2″ x 44″ for strip sets
Orange Fabric
– Cut 3 strips 2 1/2″ x 44″ for strip sets
-Cut 3 strips 2 1/4″ x 44″ for binding
Black Fabric
-Cut 3 strips 6 1/2″ x 44″ For background
-Cut 3 strips 3″ x 44″ for border
Step 2: Sew and Cut Triangles
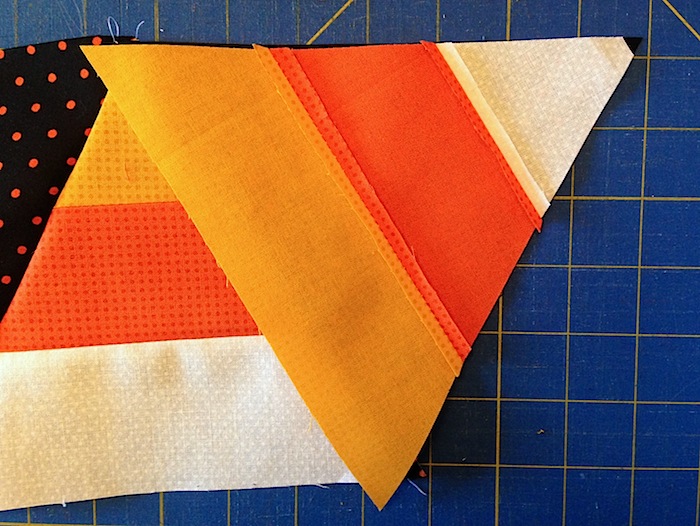
Take your 2 1/2″ strips, and sew a white, orange and yellow strip together lengthwise (orange will always be in the middle). Press seams open.

You will now have three sets of 3 sewn strips that match the photo above.

Line your Pyramid Ruler (or your printed template) up with the top and bottom edge of your strip set and cut out your first triangle. (Don’t worry if your strips are wider or narrower than the template, just line your template up with the top edge.)

Flip your template and cut your next triangle. Repeat until you have 21 triangles.
Next, take your 3 black 6 1/2″ wide strips and cut them the same way you just cut your strip sets. Cut 21 triangles.
Step 3: Sew Triangles for Table Runner
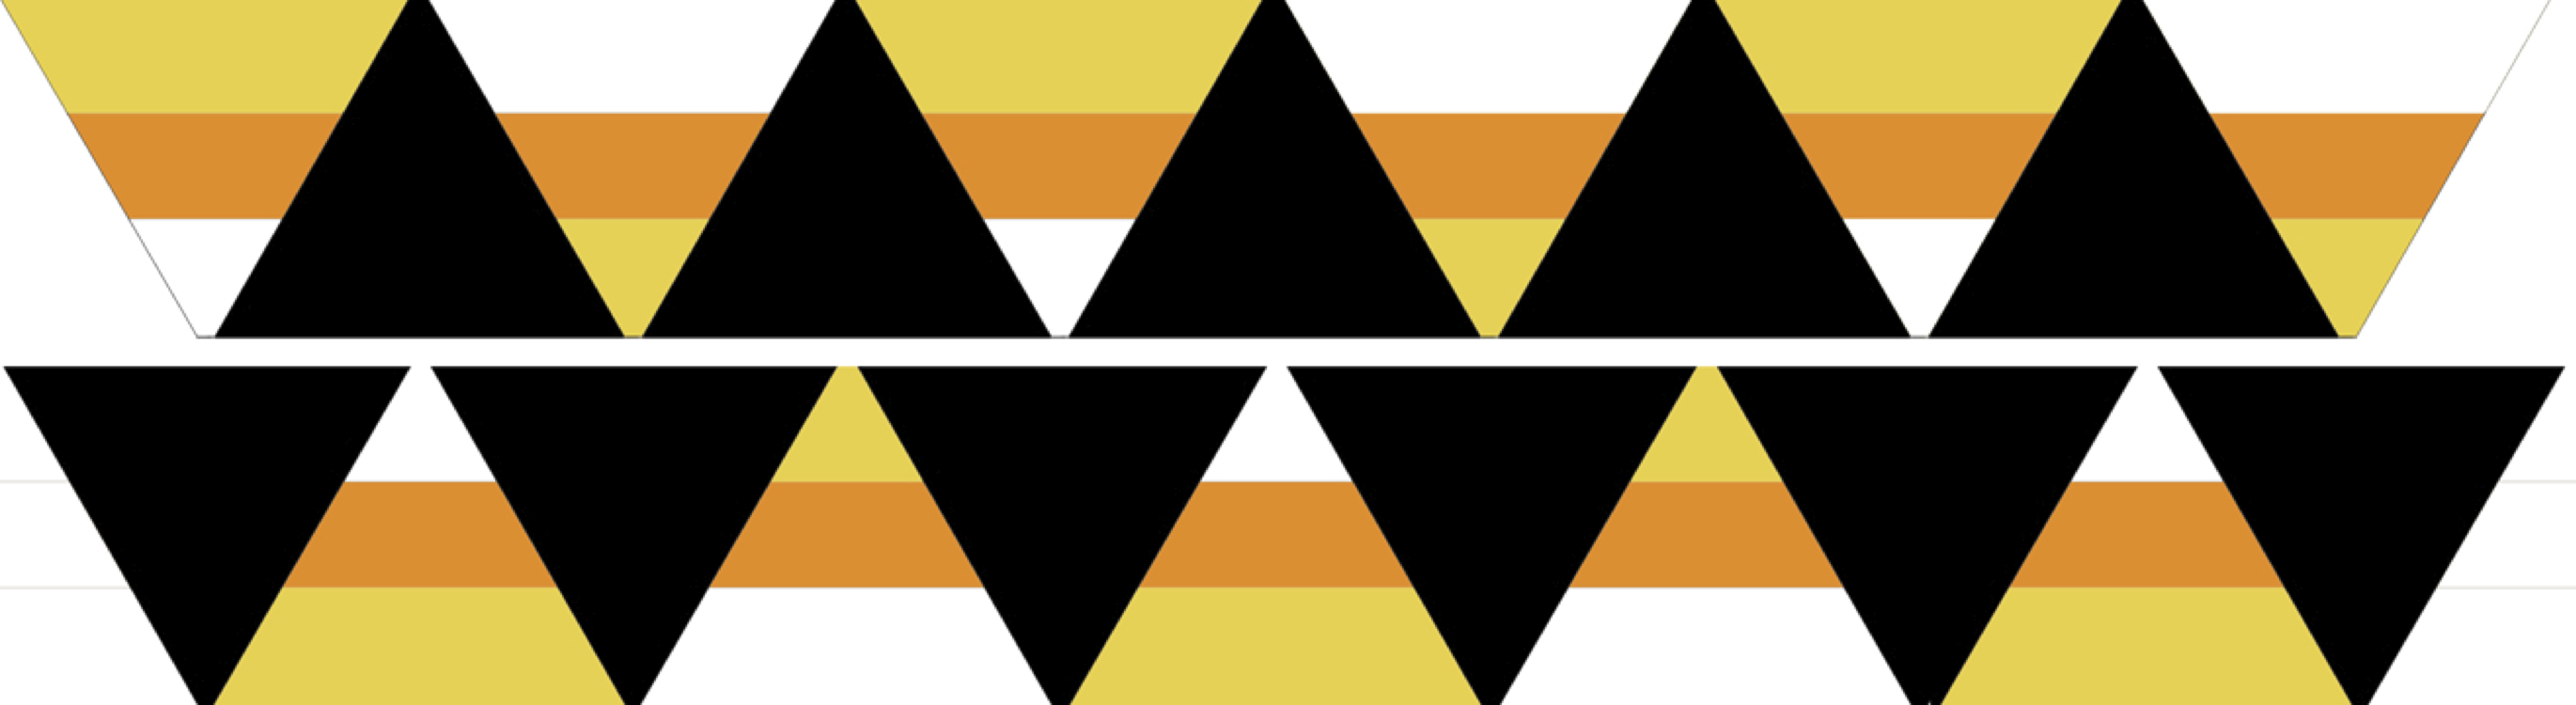
Sew triangles together using the diagram above as a guide.
Triangles are sewn right sides together using a 1/4″ seam allowance. Press all seams the same direction.


You’ll now have two strips of triangles.
Step 4: Assemble your table runner

Sew the two strips of triangles together, matching the point of the candy corn triangle with the center of the black triangle. Press seam open.

As an alternate layout, you can match your triangles point to point to create diamonds.

Trim sides of table runner, so they are even, as pictured above.

For the border, sew the black 3″ wide strips to the sides of the runner, trim, then sew to the top and bottom. Press all seams towards border.
Most of my readers are quilters, so I am not going to bore you with instructions on quilting and binding (plus it would get really long!), but here is a list of my favorite tutorials, if you need help:
– Making a “Quilt Sandwich” at Oh Fransson: that’s quilter speak for layering the top, batting and backing.
– Straight line quilting tutorial at Amy’s Creative Side.
– Double Fold Binding Tutorial at Canoe Ridge Creations.
Step 5: Make your bunting!
You should have 10 orange and 10 black triangles left over. Feel free to cut more and make longer bunting.

With right sides together, sew an orange and a black triangle along two sides.

Clip point, turn and press flat. Repeat to make 9 more triangles.
Clip off those tiny seam allowance points that are sticking out of the raw edge.

Open bias tape up, align with raw edge of a triangle and sew. Butt next triangle up to first and sew to the same piece of bias tape. Continue for all triangles.

Fold bias tape around to orange side of bunting and press. Sew just inside the edge of the bias tape.
You are done!
Happy Halloween and enjoy your new decorations.
For more craft and sewing ideas, check out Jo-Ann Fabric’s Celebrate the Season website. There are tons of project ideas from very talented craft and sewing bloggers. You can also search #spookyspaces on Instagram and Twitter.
As an added bonus to you, I have a 50% coupon to get you started on your holiday projects!

This tutorial is part of the Jo‐Ann Fabric and Craft Stores® Celebrate the Season campaign. I was given a gift card to create a unique holiday projects, but all views, opinions and designs are my own.
Great job, Janice! Both the runner and the bunting are really ‘sweet’! Hope you don’t mind if I share this, with a link back, on my facebook page at http://facebook.com/sewfreshquilts
Great job! Way to make something modern, cute, and seasonal with Joann’s materials. I am impressed. When I have space for decorations – I will look this up for sure.
Isn’t that the cutest thing! Enjoy your new decorations
These are super cute 🙂 I bought that pyramid ruler to make the triangles for my Marcelle Medallion and I love it.
These are TOO cute, Janice!
🙂 Kelly
That is so very cute and clever! Your tut is so much fun.
This is really cute! Thanks for sharing!
Neat! I love it. I have a candy corn thing, one of my favorite decoration things 🙂
Sew super cute!!! Nice straight corners… 🙂
How cute! The candy corn is just perfect. I don’t like spooky myself,lol. Love these!