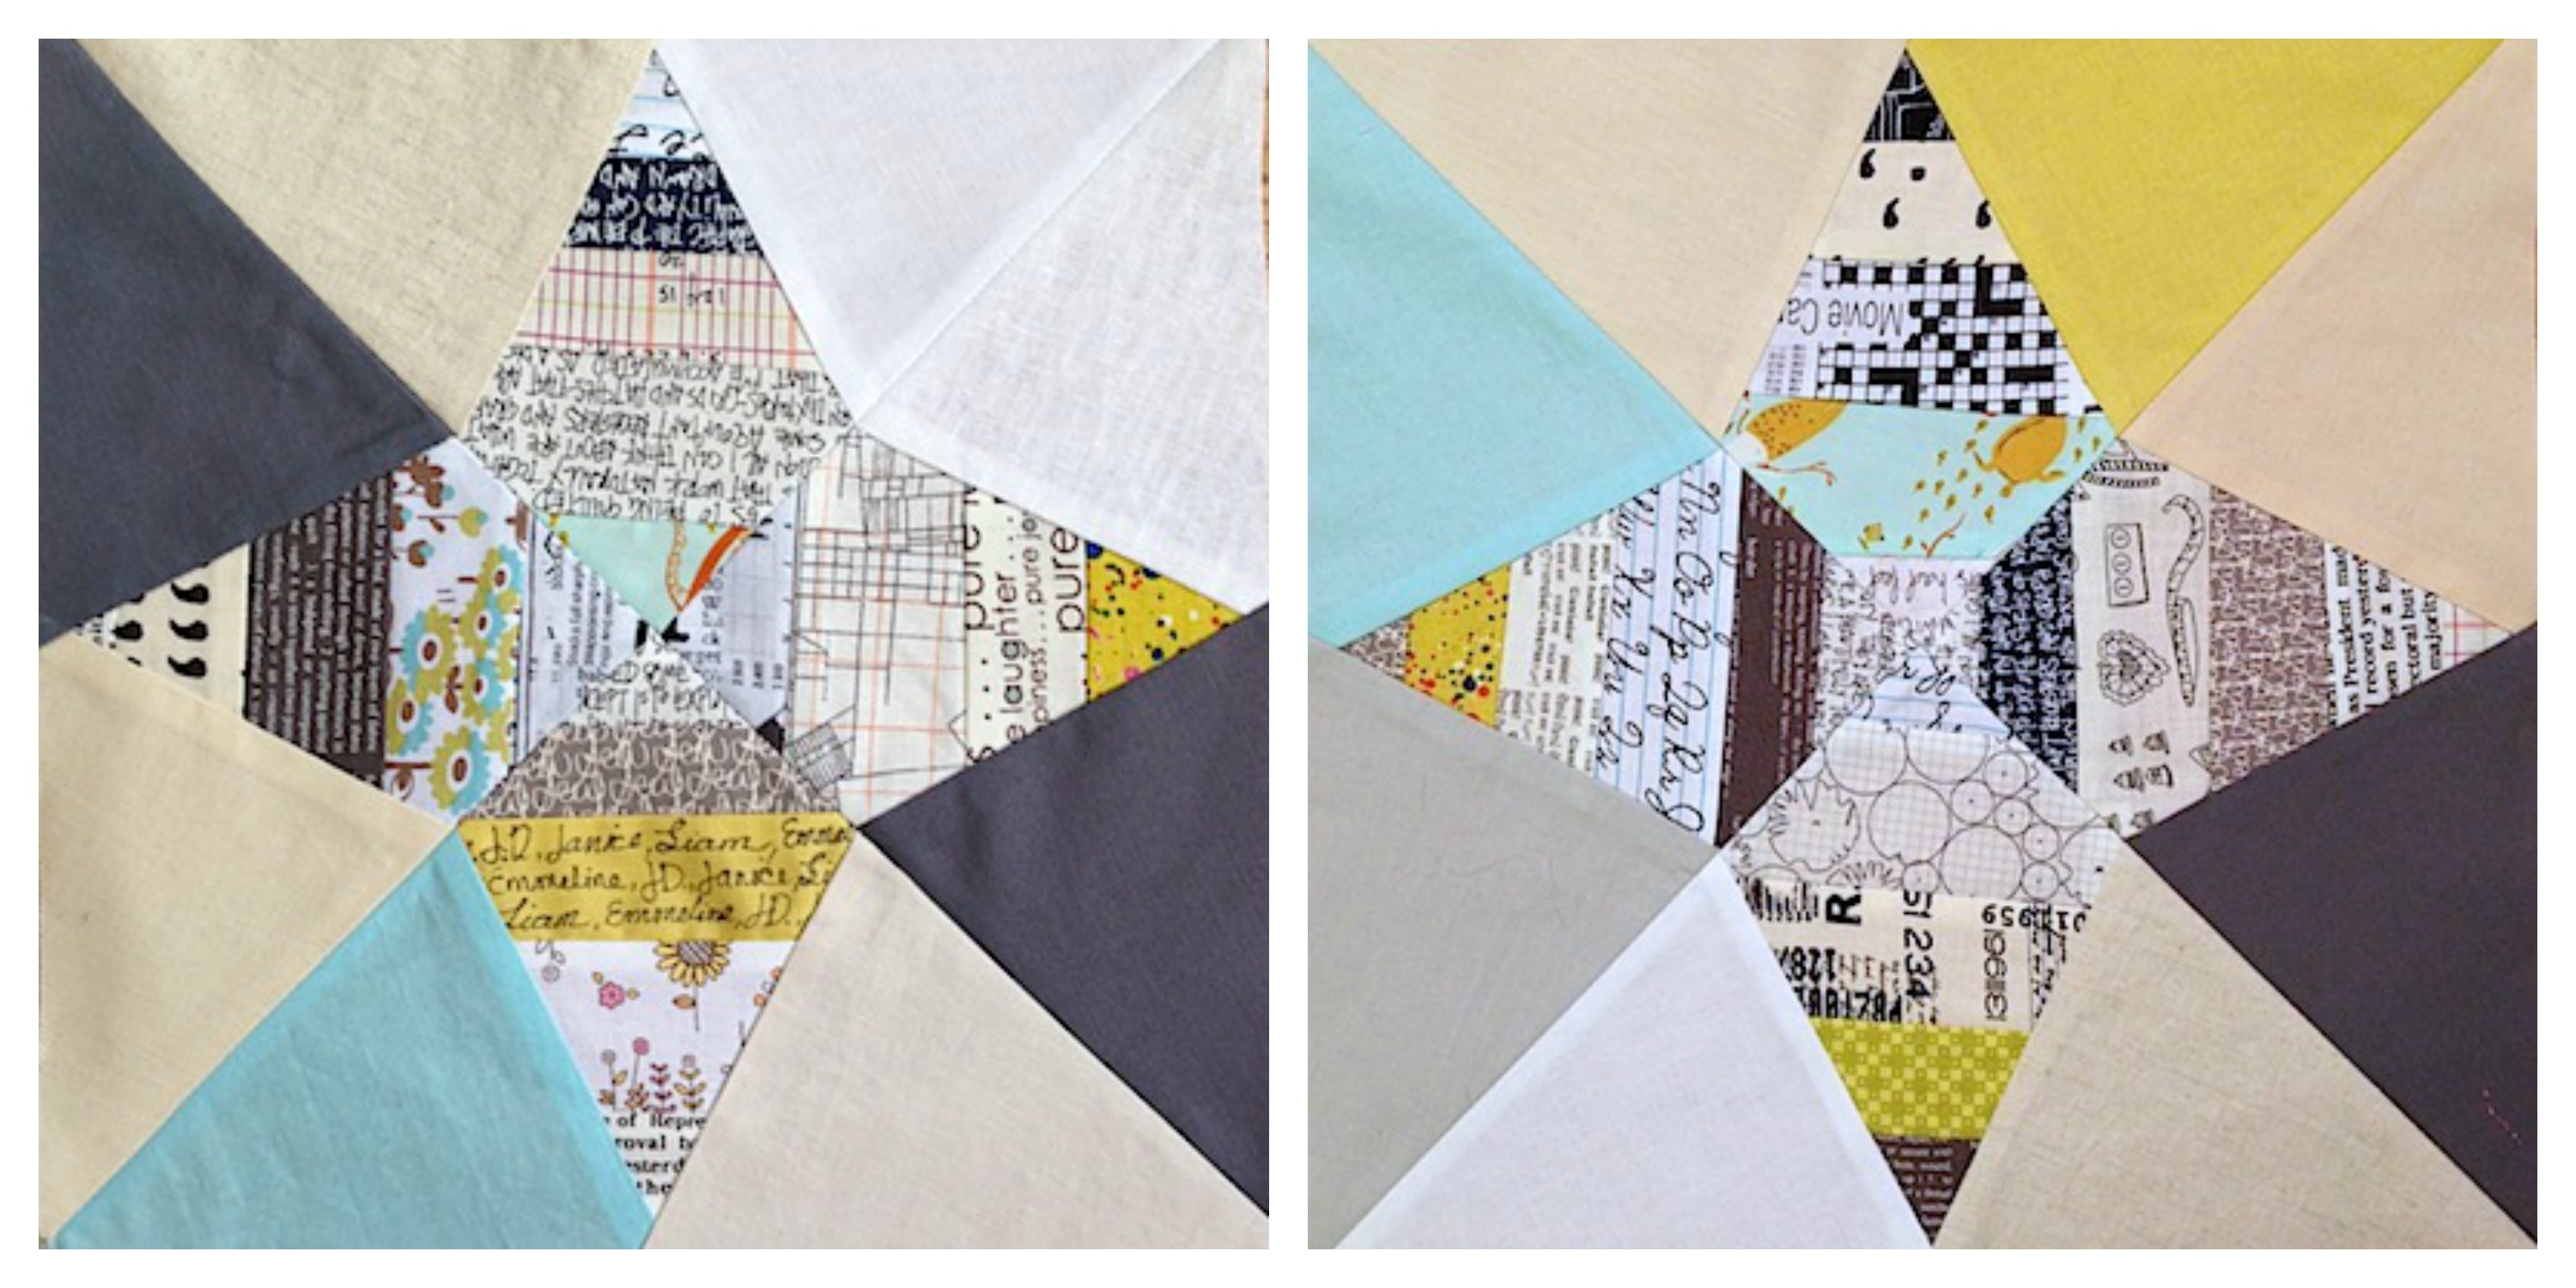
June is my month for Bee Happy Quilting Bee, so I am posting a quick tutorial for a Reverse Spiderweb Quilt Block. If you are not a part of my bee, feel free to still use the tutorial. I probably won’t get this quilt done for a long time, so I’d love to see what a finished one looks like (ha-ha!)

Here is a diagram of the finished quilt. There will be more touches of color, though. I was inspired by this lovely quilt by “Swim, Bike, Quilt”. I love the way the various solids create movement in the quilt. I also wanted to use an amazing shade of yellow fabric that I saw at Sew Modern.
You’ll each be making two 12.5″ blocks using the fabrics I have provided. Please feel free to cut the strips narrower, or just leave them wide. The solid background pieces are precut for sewing.
What you will need for one 12.5″ block:
- Templates- I am printing them out for my Bee members, but if you need them they can be downloaded from google docs. If you have 8.5″ x 14″ paper, go here. If you only have 8.5″ x 11″ paper go here. Make sure you download the file to your desktop and print at 100%.
- Various scrappy strips for diamond templates.
- Eight 5.5″x 6.5″ rectangles for background.
Before you begin:

- Cut out your templates and set the large triangle aside for now.
- Shorten your stitch length to about a 1.5.
- All seam allowances are 1/4″.

1. Take a diamond-shaped template and lay your strips out to get an idea of placement. I’d like any directional prints to be oriented so that the shorter point is towards the top and the longer point is towards the bottom. If you mess-up and flip a strip (or two, or three…), please don’t change it!

2. Starting at the shorter point, place two fabrics, right sides together, on the template and stitch.

3. Continue to sew strips, until you have covered the entire template.

4. Trim off excess fabric along outer edge of template.

5. You have one diamond down. Now do that 3 more times!

6. Take a 5.5″x 6.5″ rectangle and pin it, right sides together, to the long side of your diamond. Sew.

7. Press seam allowances towards rectangle. Repeat with other side and with three other diamonds.

8. Now, grab that triangle template you cut out earlier and pin it to your triangle, lining up seam lines and points.

9. Cut off excess fabric, using template as a guide. I save time by laying all four triangles on top of each other and cutting them all at the same time.

10. You now have a triangle!

11. Arrange the 4 triangles like photo above.

12. Sew two triangles together and press seam allowances open. Repeat with other half. Be careful not to stretch your fabric while sewing.

13. Sew two halves together and press seam allowance open. I like to remove some of the paper from the seam allowances before sewing the two halves, but it is your personal preference.
You now have a finished Reverse Spiderweb Block! Pull those papers out, or mail the block back to me and I’ll pull them out.
Notes to my Bee Members:
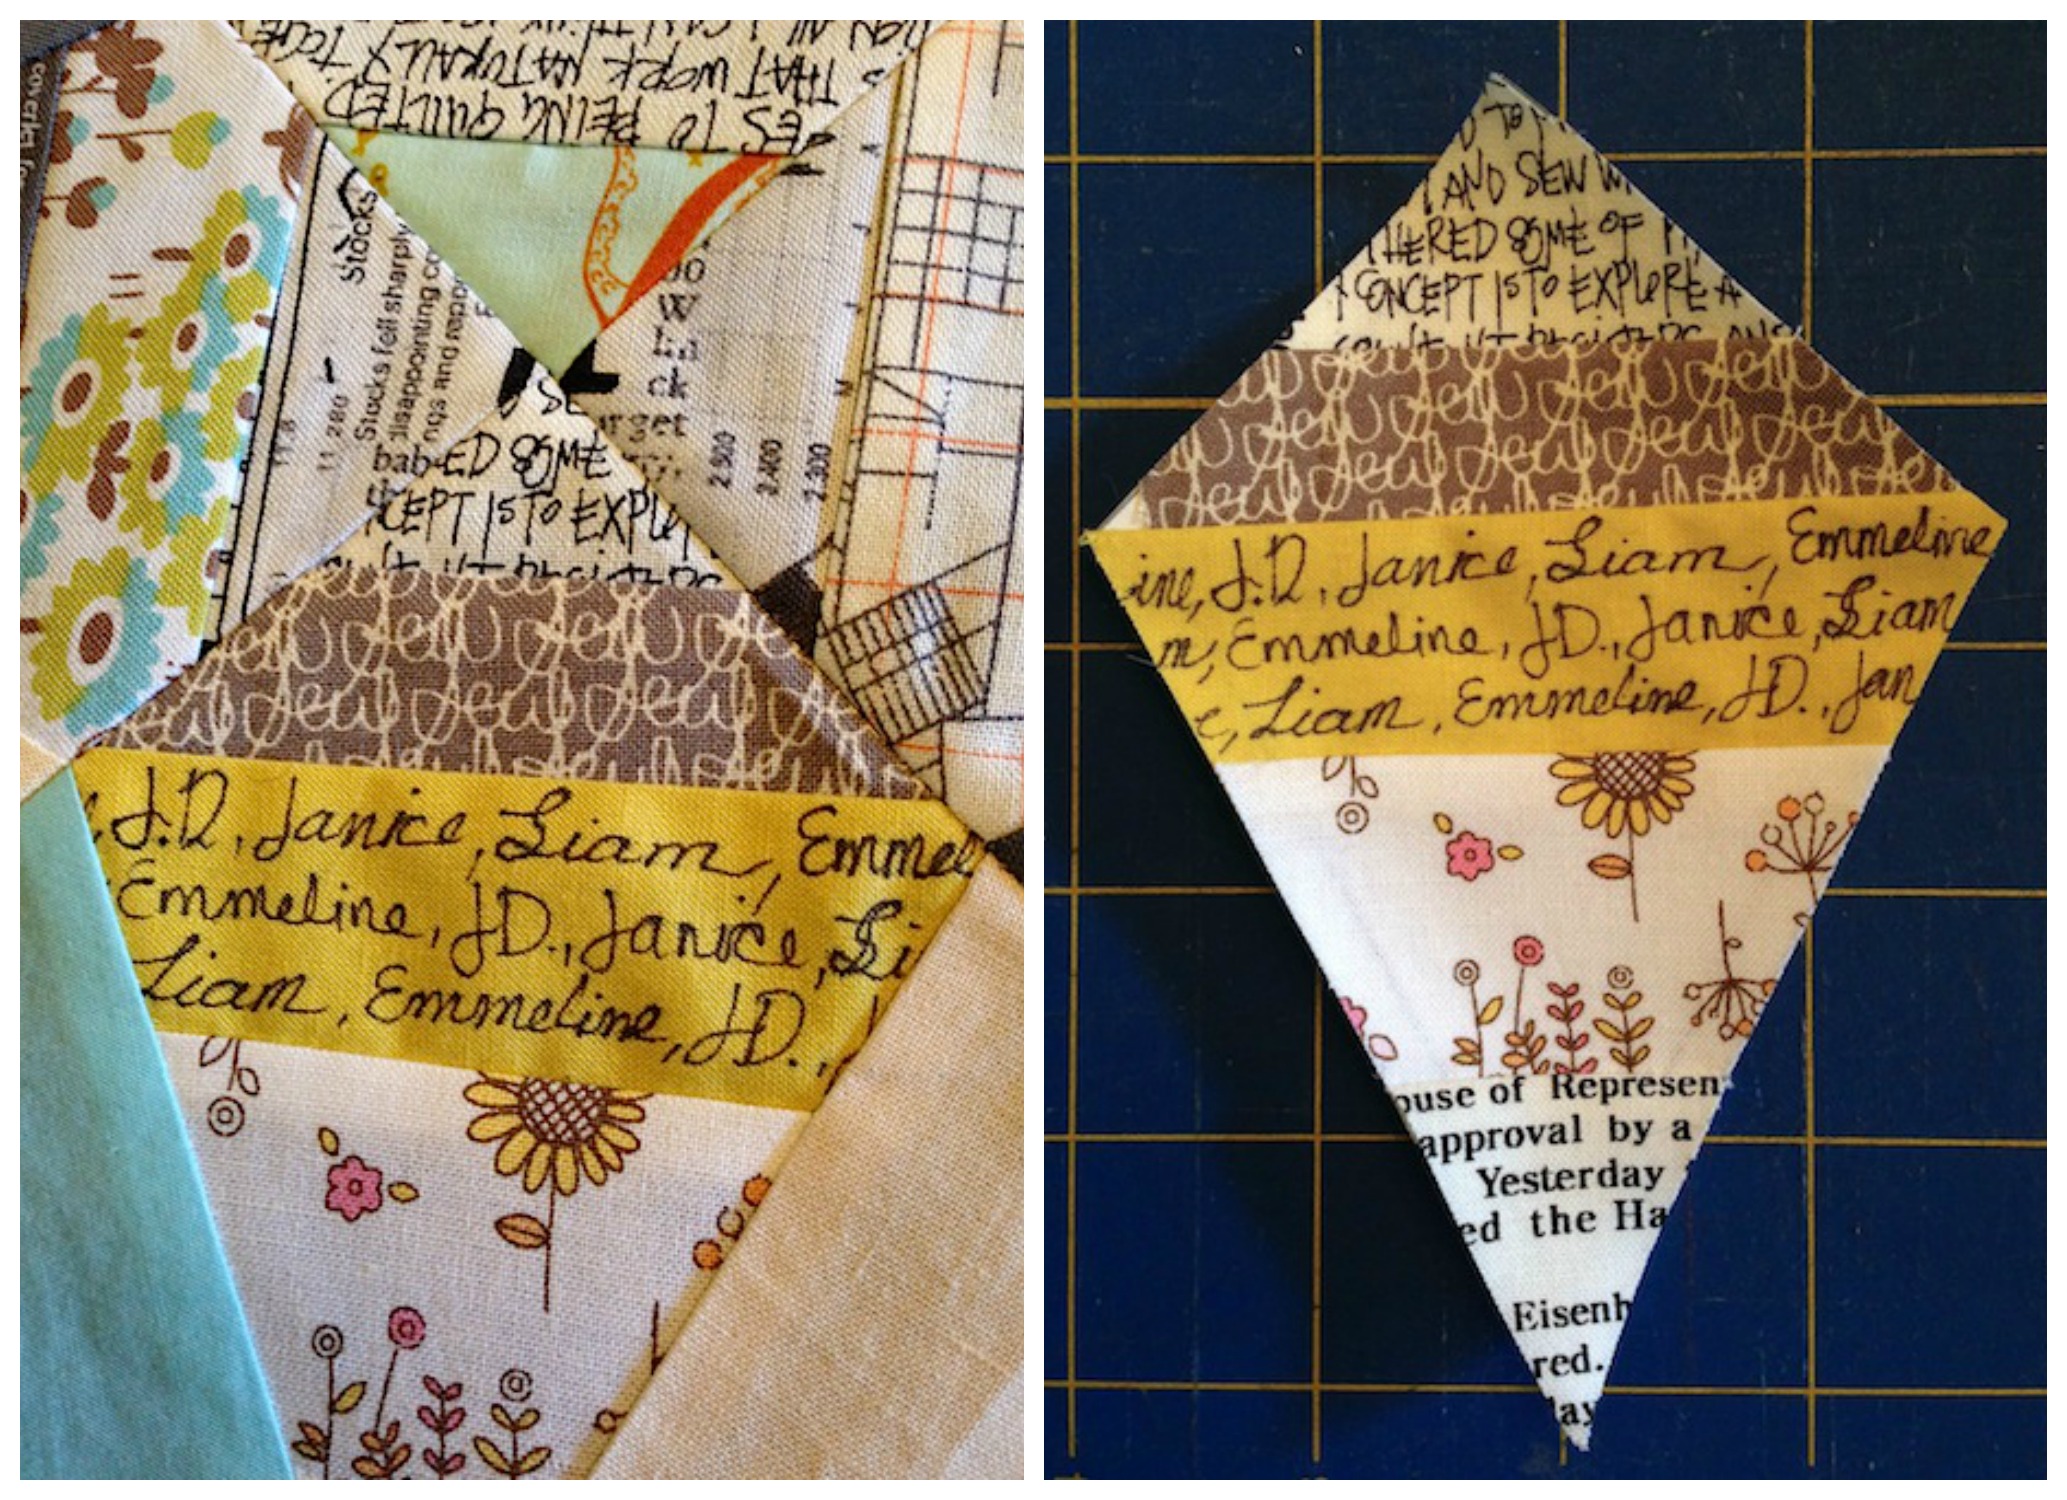
• I’d like you to add a personalized strip to one diamond on one block. Take a solid scrap from one of your rectangles and write a message on it with permanent marker. You can choose any of the solid fabrics I sent you for the strip and you can use a black, yellow or light aqua pen. You can write anything you like, but I’d like you to include, at least, your first name.
• Latifah, Katie, Ramona, Nicole and Kelly will each be making one Spiderweb block and one Wonky House Block. Information on the Wonky Log Cabin House Block is here.
Thanks! I pinned this for later.
Wonderful idea! Thanks for the tutorial.
The resulting pattern is so very interesting! Great/clear tute!! Thanks so much!
I’m so obsessed with these colors. Love. I like the un-spiderweb block.
Thanks so much for this idea! I’ve been wanting to use up my scraps but didn’t like the traditional spider web. I’ll be adding this to my list.
Beautiful! I love the fabric you selected as well as the design. Thanks for sharing!
Great tutorial – what a fun block! I’m excited to see the completed quilt.
I’m excited to get working on this and it looks like your fabric choices are going to be really fun to work with!
Great block – perfect for a bee too!
I love the colours you’ve used, might have to try this!
This is going to be a beautiful quilt when you complete it!!
Shoot!! I forgot to add the signature solid strip! It’s not too late…maybe I can do that now. 🙂 (cart before the horse…once again!)