Welcome to day 4 of the Sew Seasonal Blog Hop!
Kristy at Quiet Play and Alyce at Blossom Heart Quilts have teamed up to bring you 25 (FREE!) Christmas-themed block patterns to help put you in a Christmassy mood and get you started on your handmade holiday projects. Stay tuned for the end of my post, because there are a LOT of prizes to be won!
• • •
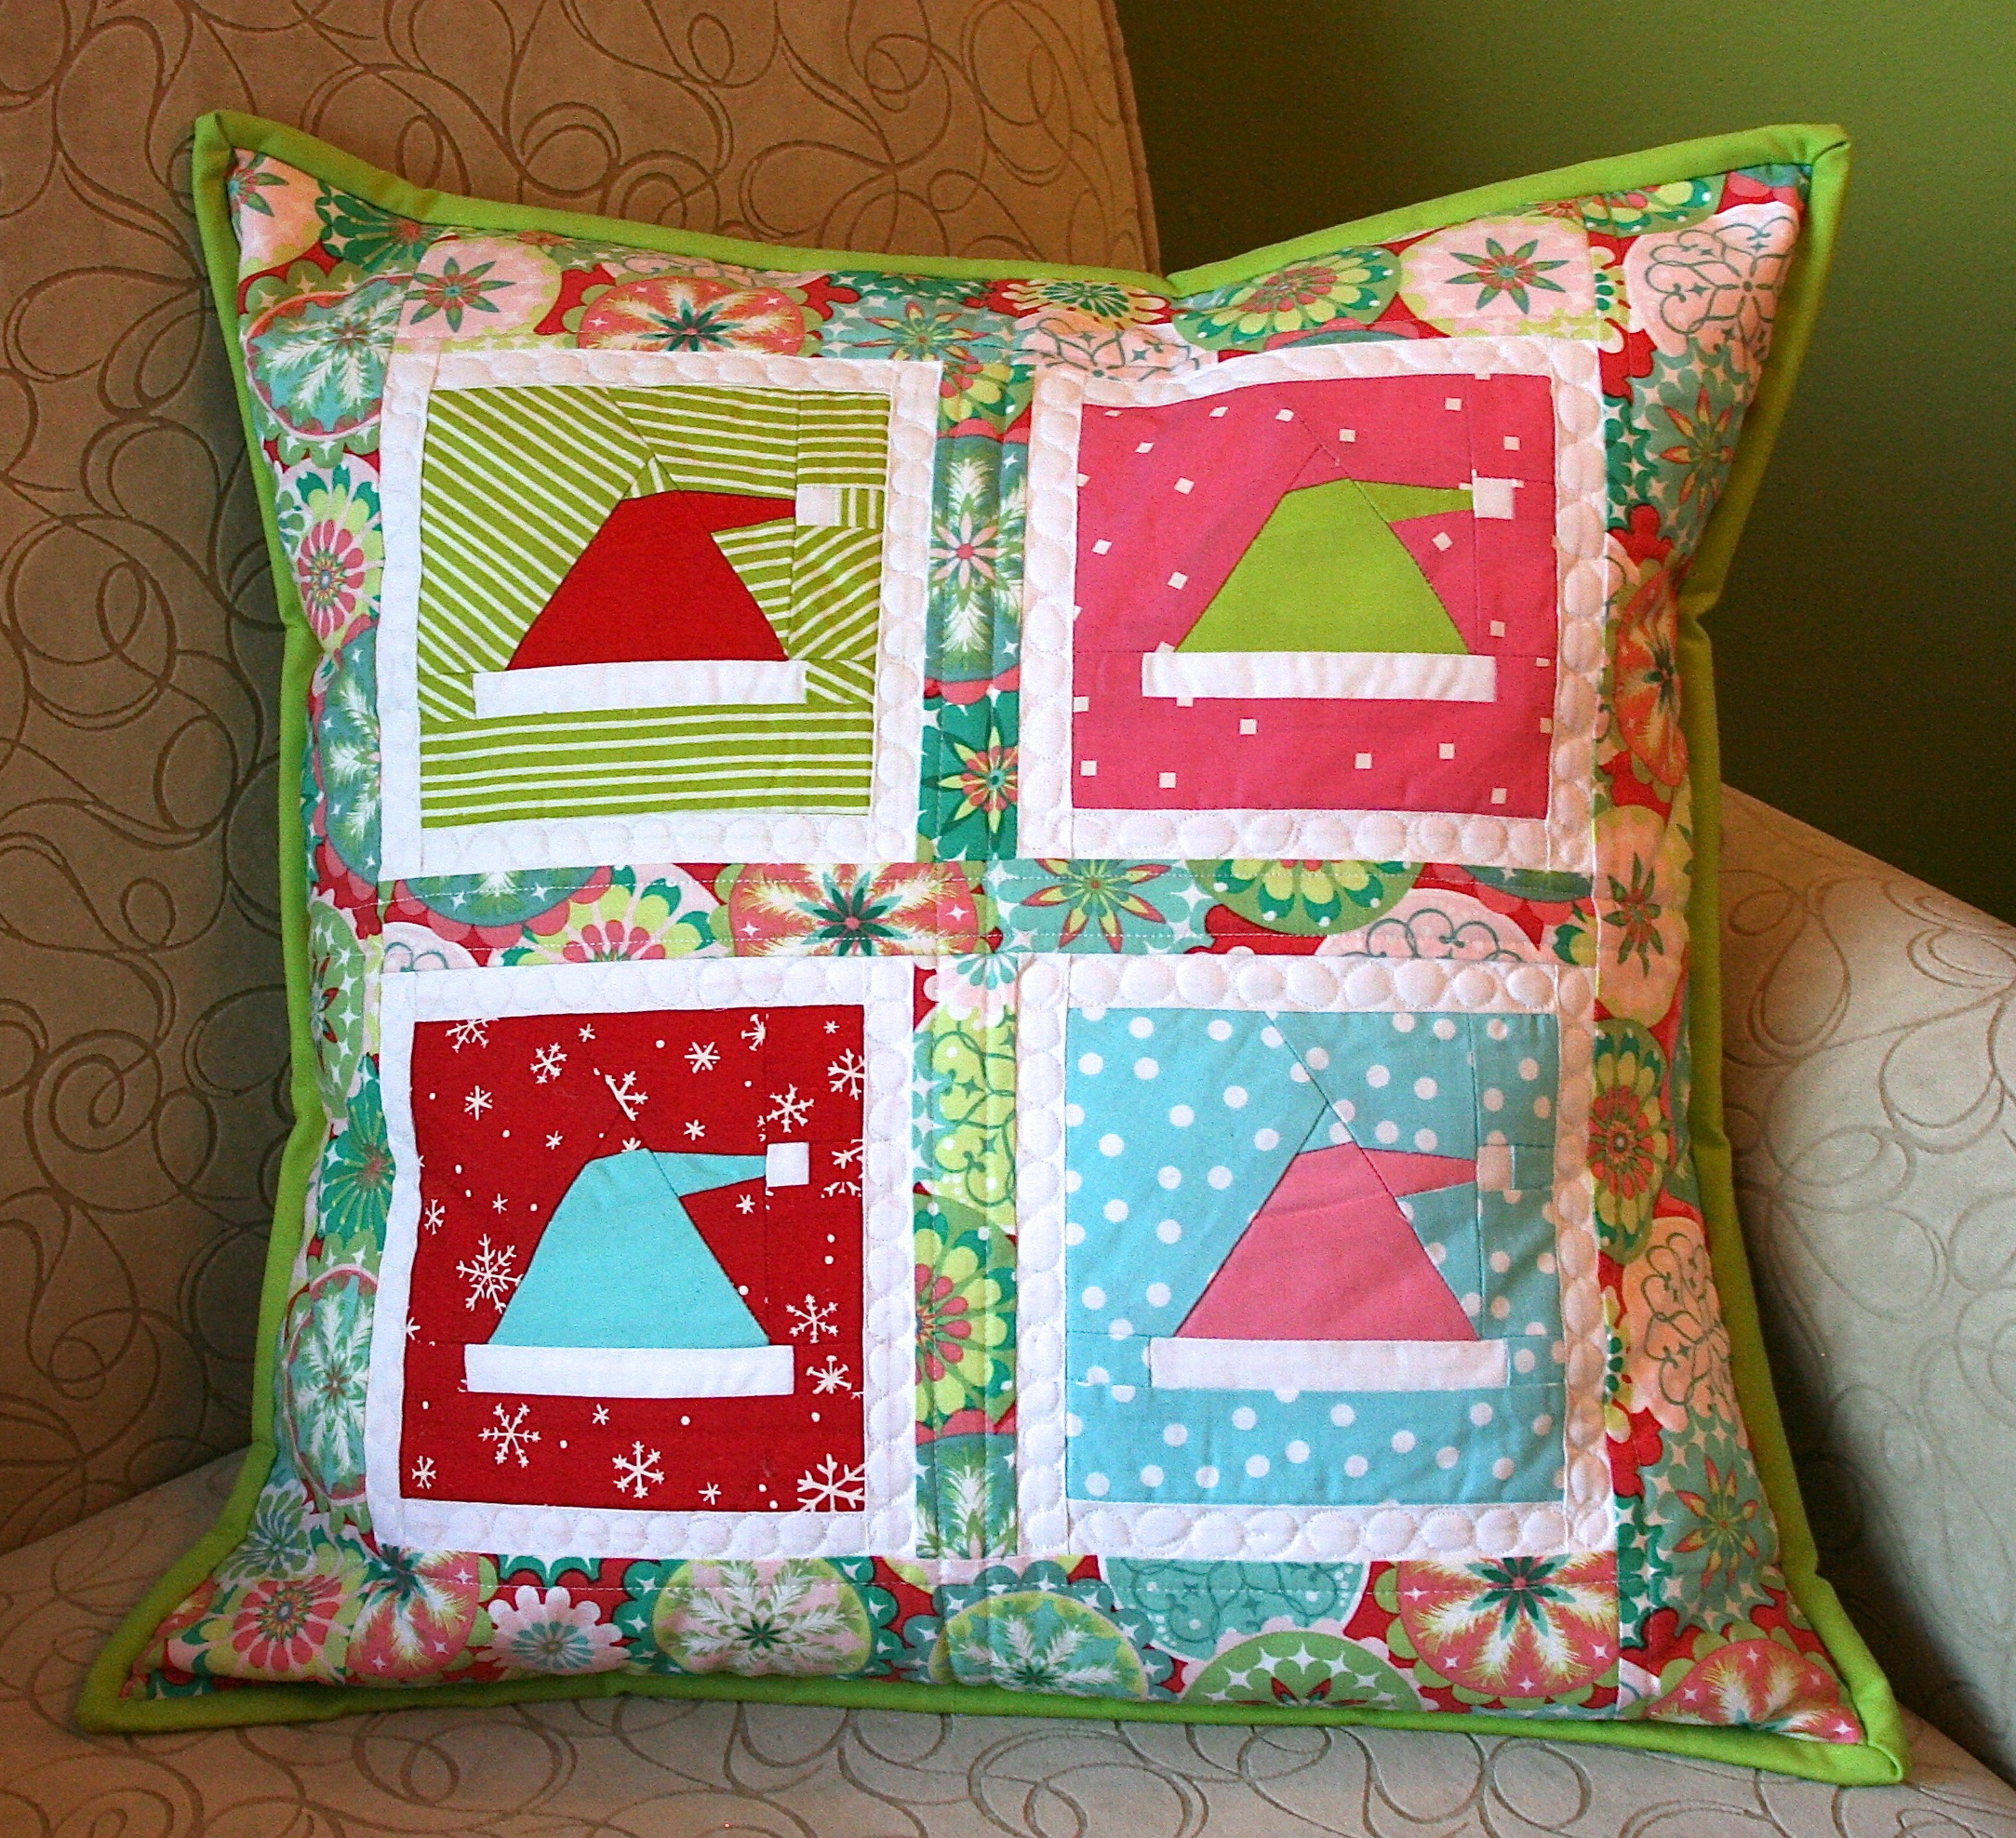
My block is a paper-pieced Santa hat. I love paper-piecing and I’ve said this before, but if you can count to 10 and sew a straight line, you can paper-piece.
As you can see, I couldn’t stop at just one block. They are each 5″ square and SO adorable.
I need Christmas pillows to go with my Christmas quilt, so I now have one done!
Have you ever made a pillow? If not, I’m going to give you a quick tutorial on how I make mine. Making pillows is a cheap, fun, way to redecorate your home. They are literally made of scraps, can be sewn in a couple hours, and are SO much nicer and cheaper than store-bought pillows.
First, you need to make your pillow front. It can be one piece of really amazing fabric, or pieced, like a quilt. I suggest you get working on some of Kristy and Alyce’s blocks!
I am using a 20″x 20″ pillow form, so I made a 19″ x 19″ square (I like my pillows to be overstuffed and full).
Next, make a quilt sandwich by layering your 19″x19″ square, a slightly larger piece of batting, and a piece of muslin, or other plain cotton (I use muslin because it is cheap and I have a bolt of it.)
Quilt as desired and true up the sides.
The front of your pillow is done! Now on to the back:
Cut 2 pieces of backing fabric: one 19″x 11.5″ and one 19″x 14″
Cut 2 pieces of muslin the same sizes (19″x 11.5″ and 19″ x 14″)
Lay the 19″x 14″ backing and muslin with wrong sides together and hem along one 19″ side.
Cut a strip of fabric 19.5″ x 2.25″ and iron in half along the long edge.
Place 19″x 11.5″ backing and muslin wrong sides together and sew folded strip to one 19″ side using a 1/4″ seam allowance.
Fold over and top stitch.
Now you are going to assemble your pillow.
Lay your pillow front on table with wrong side up and lay your larger backing piece on top of it, lining up the bottom corners.
Lay smaller backing piece on top of larger, so that you create an overlap. Pin around outer edges and machine stitch all pieces together using a scant 1/4″ seam allowance.
Cut 2.25″ strips of binding, sew binding around edges and you are done! You bind it the exact same way you bind a quilt.
I just stuff with the pillows that are already on my couch. That way, I can fold up the Christmas pillowcases for easy storage the rest of the year.
It looks pretty sweet with my Christmas quilt!
Now get sewing, so that you can join in on the linky party on November 30th! Also, be sure to check out Erin from Missy Mac Creations for the other project on today’s blog hop.
• • •
And now a word from our sponsors –
Kirsty’s blog Quiet Playor
Alyce’s blog Blossom Heart Quilts
Happy sewing!


This is so cute! Love the colours you’ve chosen for it.
WOW – I just love how your cushion has come out. Thanks for the quick tut too! I have made cushions countless times before but never like that and to be honest I am totally loving the patchwork – y look.
Hi! I love your pillow! Fantastic block for santa’s hat and great idea to use it for a pillow! Very good and simple tutorial, too! I shall link to you in my next post! I made last year also santa’s hat block which my father designed, but yours is more fun. x Teje
Great use of the Santa hats! I think I will use these for my next Santa sack!
Seriously cute!! Love the different looks to the Santa hats – so sweet!
I haven’t made a pillow cover quite like this but I think I’m definitely keen to try one with the binding! Really adds a nice touch!
So cute! Fabulous fabric choices.
Oh wow!! I love it!! Thanks for joining in!!
Janice! I love these so much!! Might have to add this to my list of things to make before Christmas. 🙂 Great job!
LOVE the blocks, thanks SO much! They look super cute all done up next to your Christmas quilt!
Your pillow and quilt are too cute! I love this idea.
Thank you for sharing your tutorial 🙂
That is beautiful!!! Love the layout and fabrics you used. The quilt is totally stunning too.
Great pillow!! Love the Santa hats!!
Ohhhh … I love your pillow !!
That is so cute Janice!!! I love all the colors and fabrics you put together! And your holiday quilt looks amazing!
This is super cute. Thanks for all the great hints too.
LOVE the santa hat pillow!!! Did you design the block yourself or buy it or find it on the net? I so want to make some of those blocks for my grand kids this Christmas. 🙂
What a great little tutorial on making a pillow. I like the binding as opposed to piping. And also the print you used as the edge on the envelope backing – what a great attention to detail! I love the paper pieced Santa hats as well – and the way you coordinated the colors. Just an awesome piece. Thanks for sharing!
-k
Your cushion is lovely! I was all geared up to try paper piecing, until you said I need to be able to count to 10 and sew a straight line! I’m doomed!
SO Cute!!
I have just the fabric for a cushion cover like yours! Your Christmas quilt is ADORABLE!!
Adorable pillow! The colors you chose are my favorite Christmas-y color combination. (I love the quilt too!)
Such cuteness….great paperpiecing!!
What an adorable pillow! Thanks for sharing the tutorial!
Love the quilt and pillow.
Your Santa hats made wonderful pillows, great work.
This is such a cute pillow! Love the Andy Warhol style Santa hats!
I love your Santa Hats Pillow!! I love your color /fabric choices!!
Susie
Hi there to every , since I am truly eager of readeing this webpage’s post to be updated regularly.
It consists of nicee data.
Hi, I love the Santa Hat block, and I have no idea if you will get this since I’m writing so much past the time, but is there a link to the Santa hat block? I’m not sure how to access that pattern. I would appreciate the help!
Beth