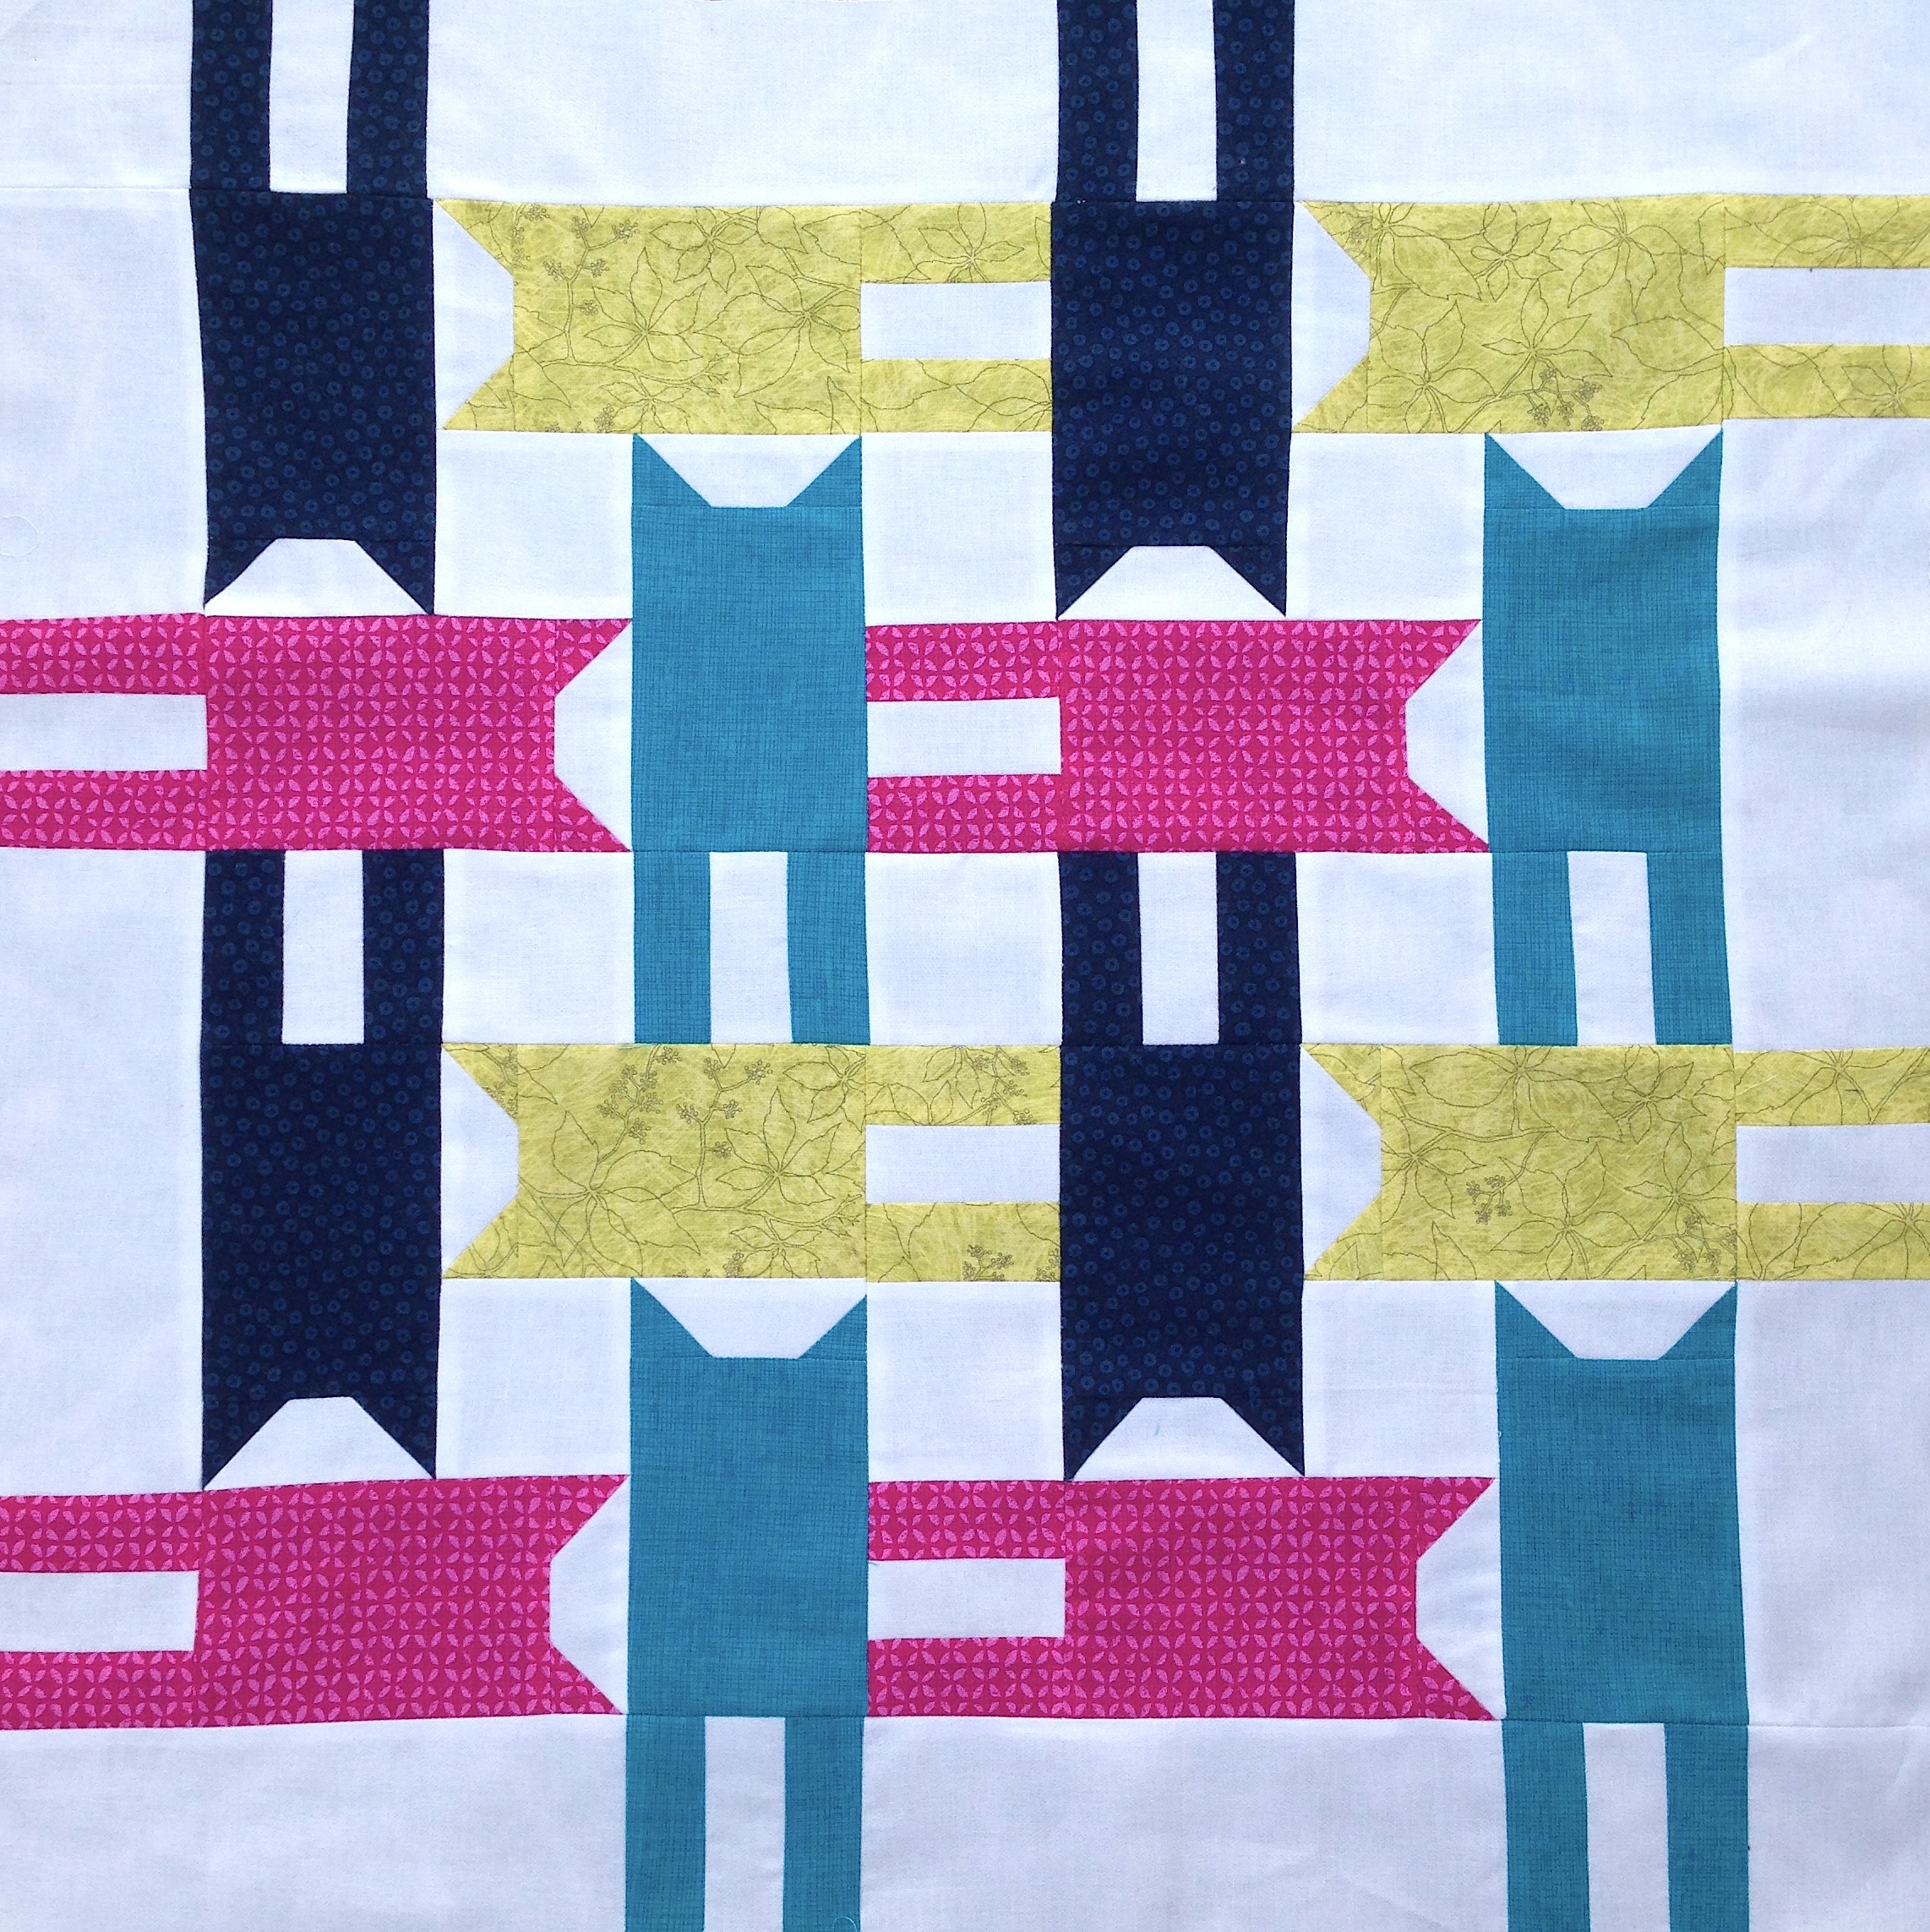
THE TUMBLING CATS TUTORIAL!

This is a tutorial for a 24″ x 24″ panel (perfect for a large pillow, or mini quilt) as pictured above. If you want to make a large quilt, scroll down the the bottom for the 11″ block.
•••
Cutting Instructions
You will be cutting pieces for 16 cats. Choose between 1-16 different fabrics and then cut pieces accordingly (I chose 4 fabrics, so I cut 4 cats per fabric). A fat eight will yield four cats.
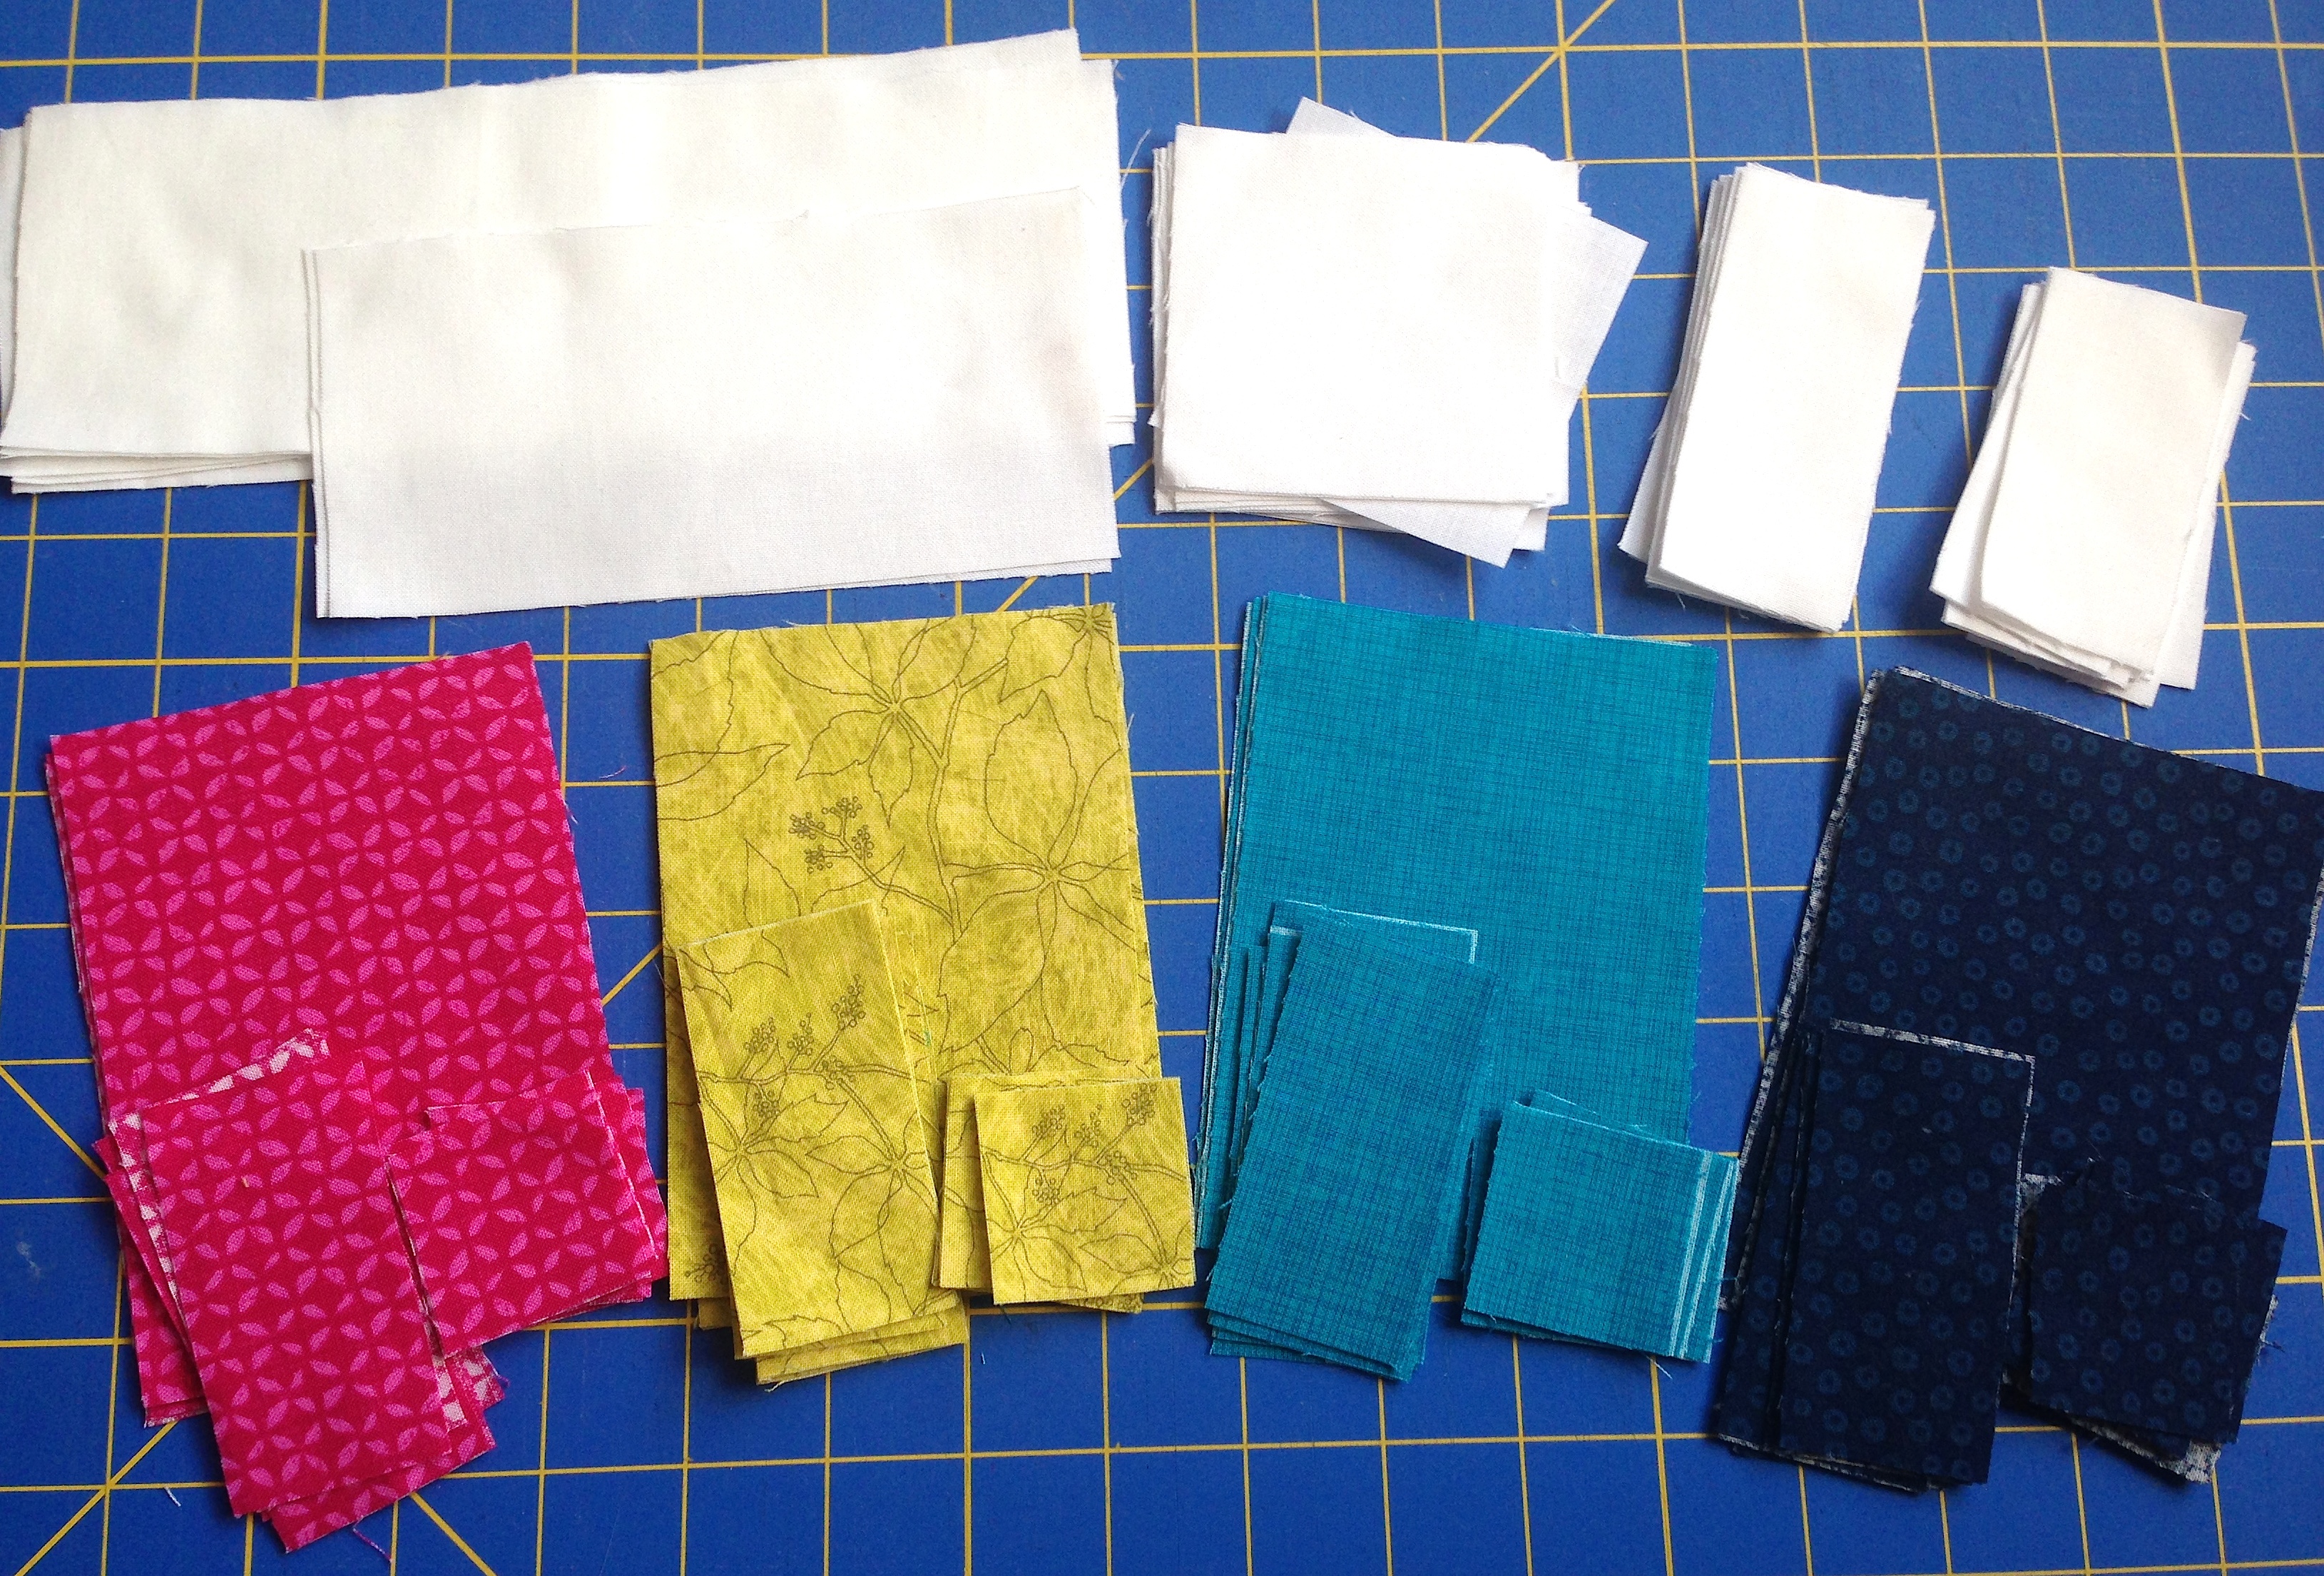
From Cat Fabric:
Cut 16 rectangles 3-1/2″ x 5″ (cat body/head- 1 per cat)
Cut 32 squares 1-1/2″ x 1-1/2″ (cat ears- 2 per cat)
Cut 31 rectangles 1-1/2″ x 3″ (cat legs- 2 per cat)
From Background Fabric:
Cut 11 squares 3″ x 3″
Cut 6 rectangles 3″ x 8-1/2″
Cut 2 rectangles 3″ x 6″
Cut 16 rectangles 1-1/2″ x 3-1/2″
Cut 16 rectangles 1-1/2″ x 3″
•••
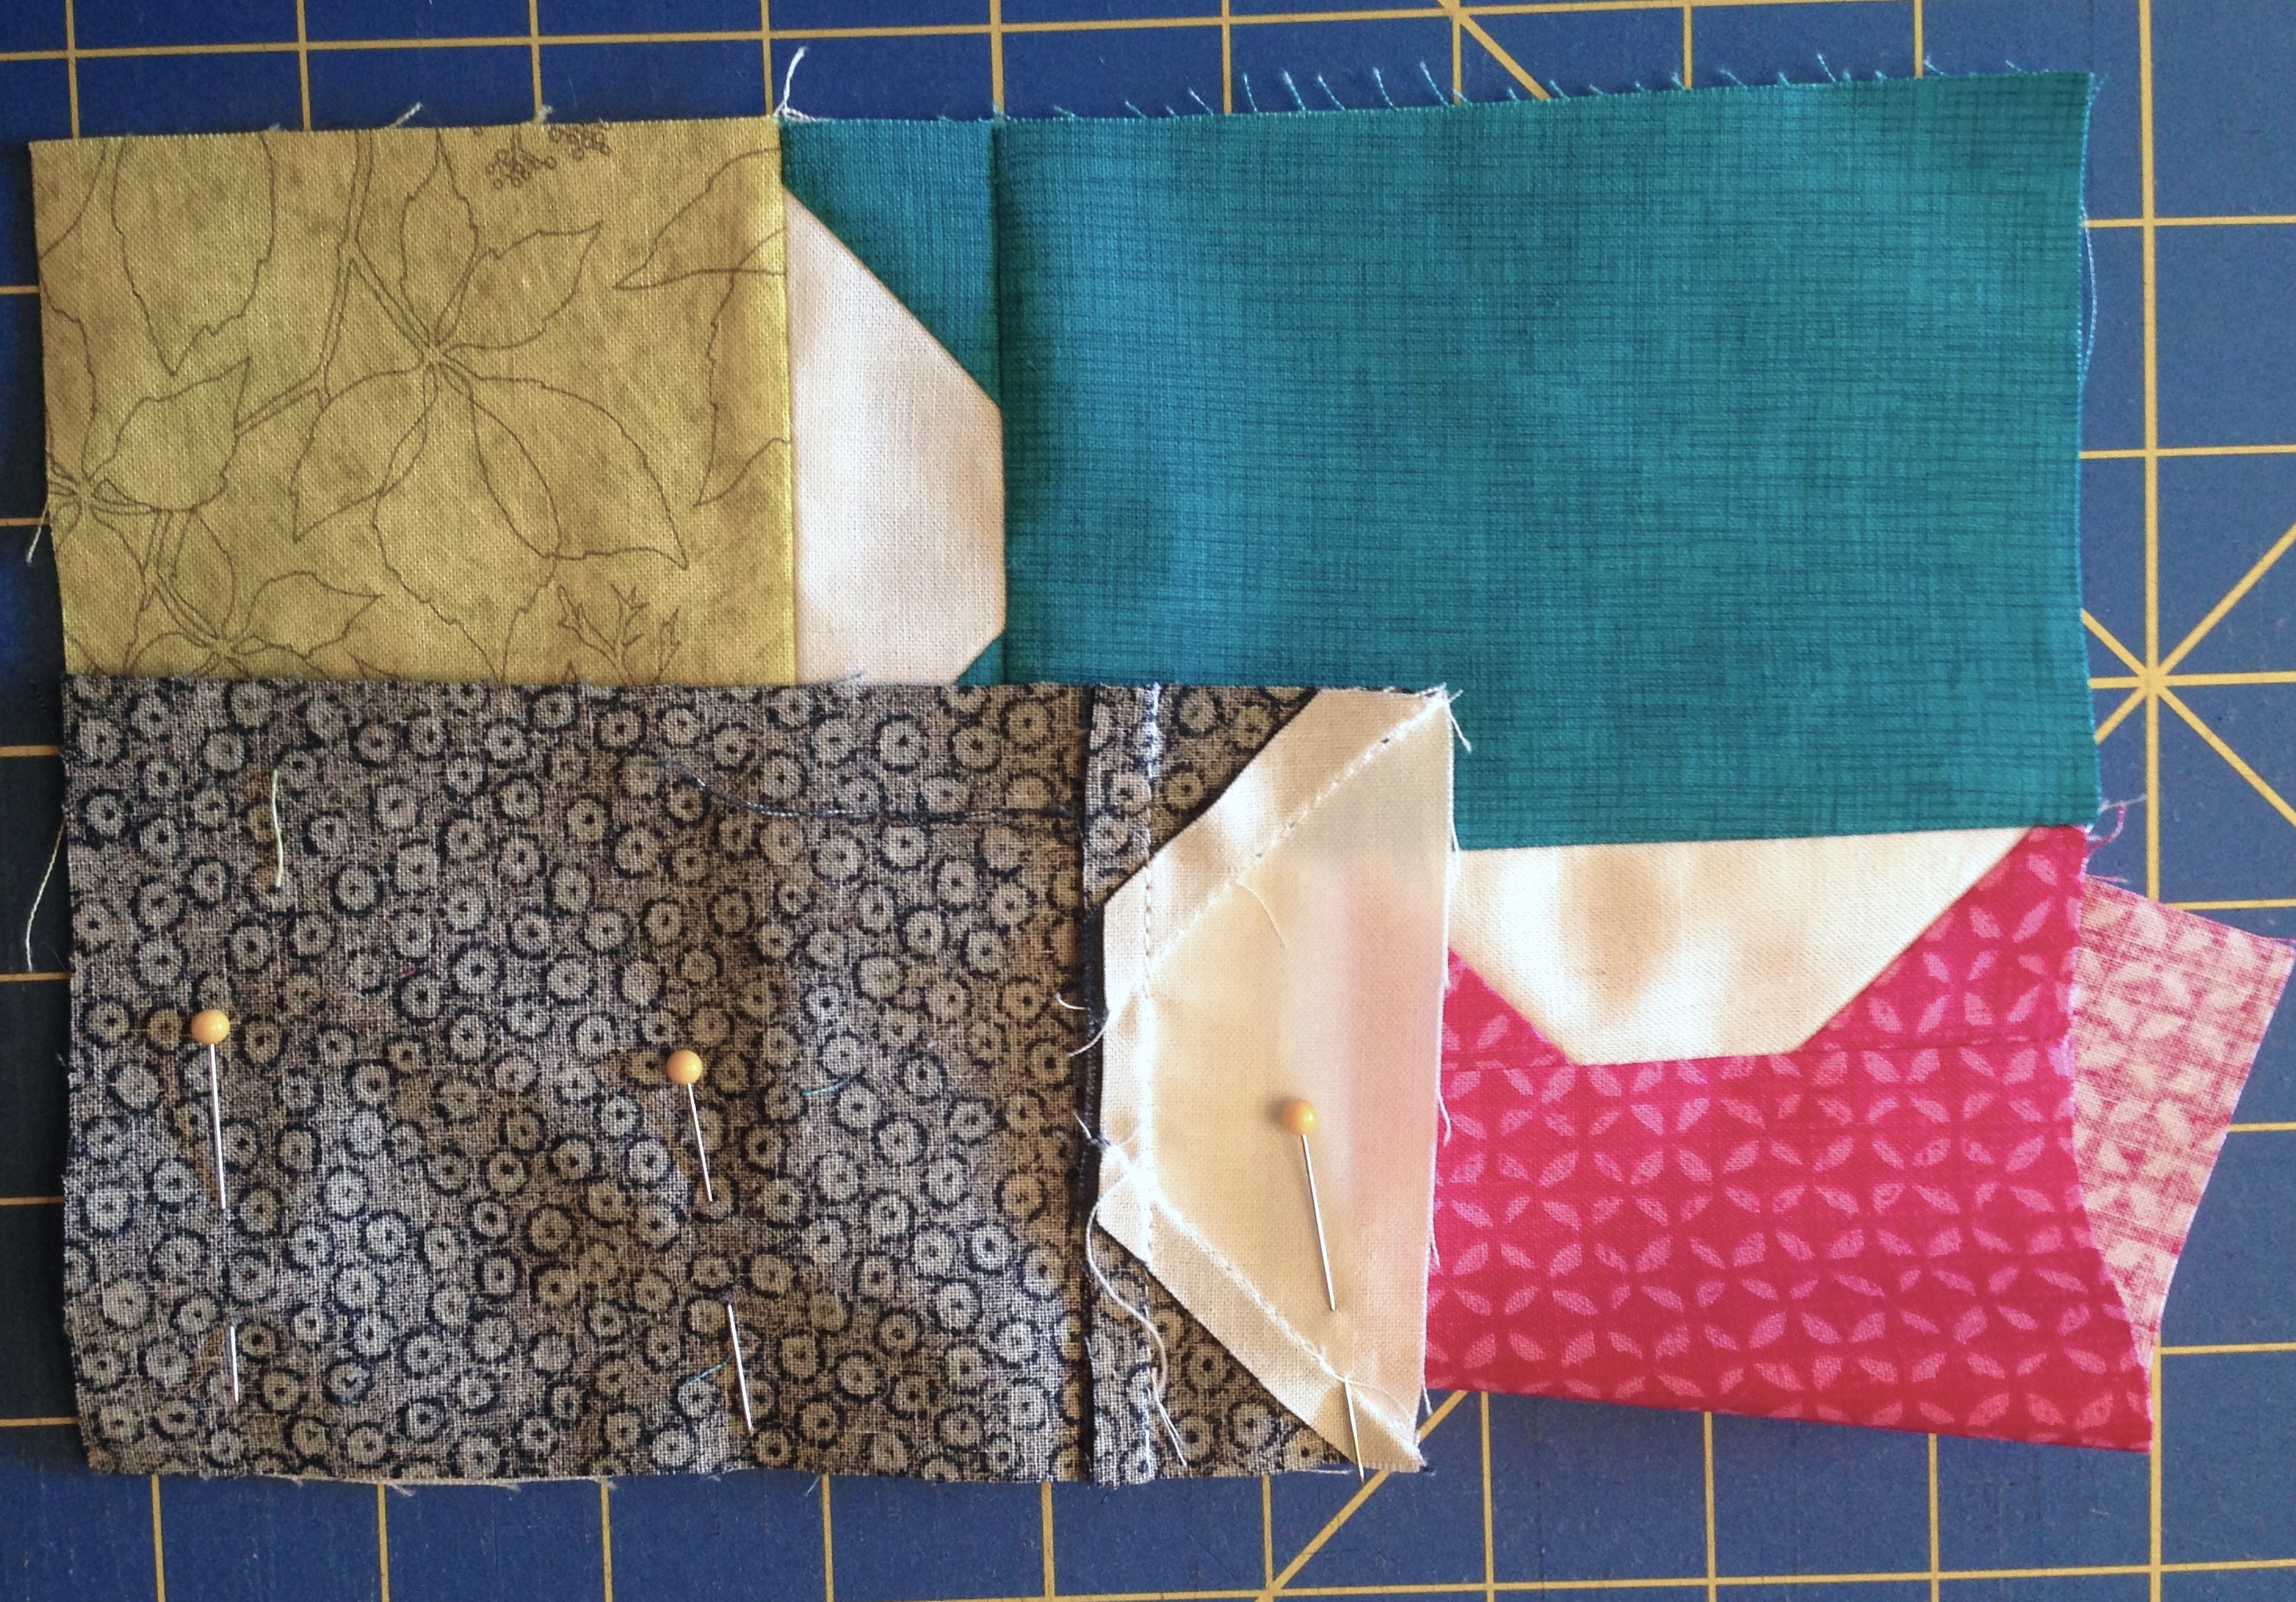
Step 1: Make the Ears
– Place two matching 1-1/2″ cat squares right sides together on either end of a
1-1/2″ x 3-1/2″ background rectangle.
– Draw a line on the cat fabric from corner to corner.

– Sew along the lines and trim excess fabric.
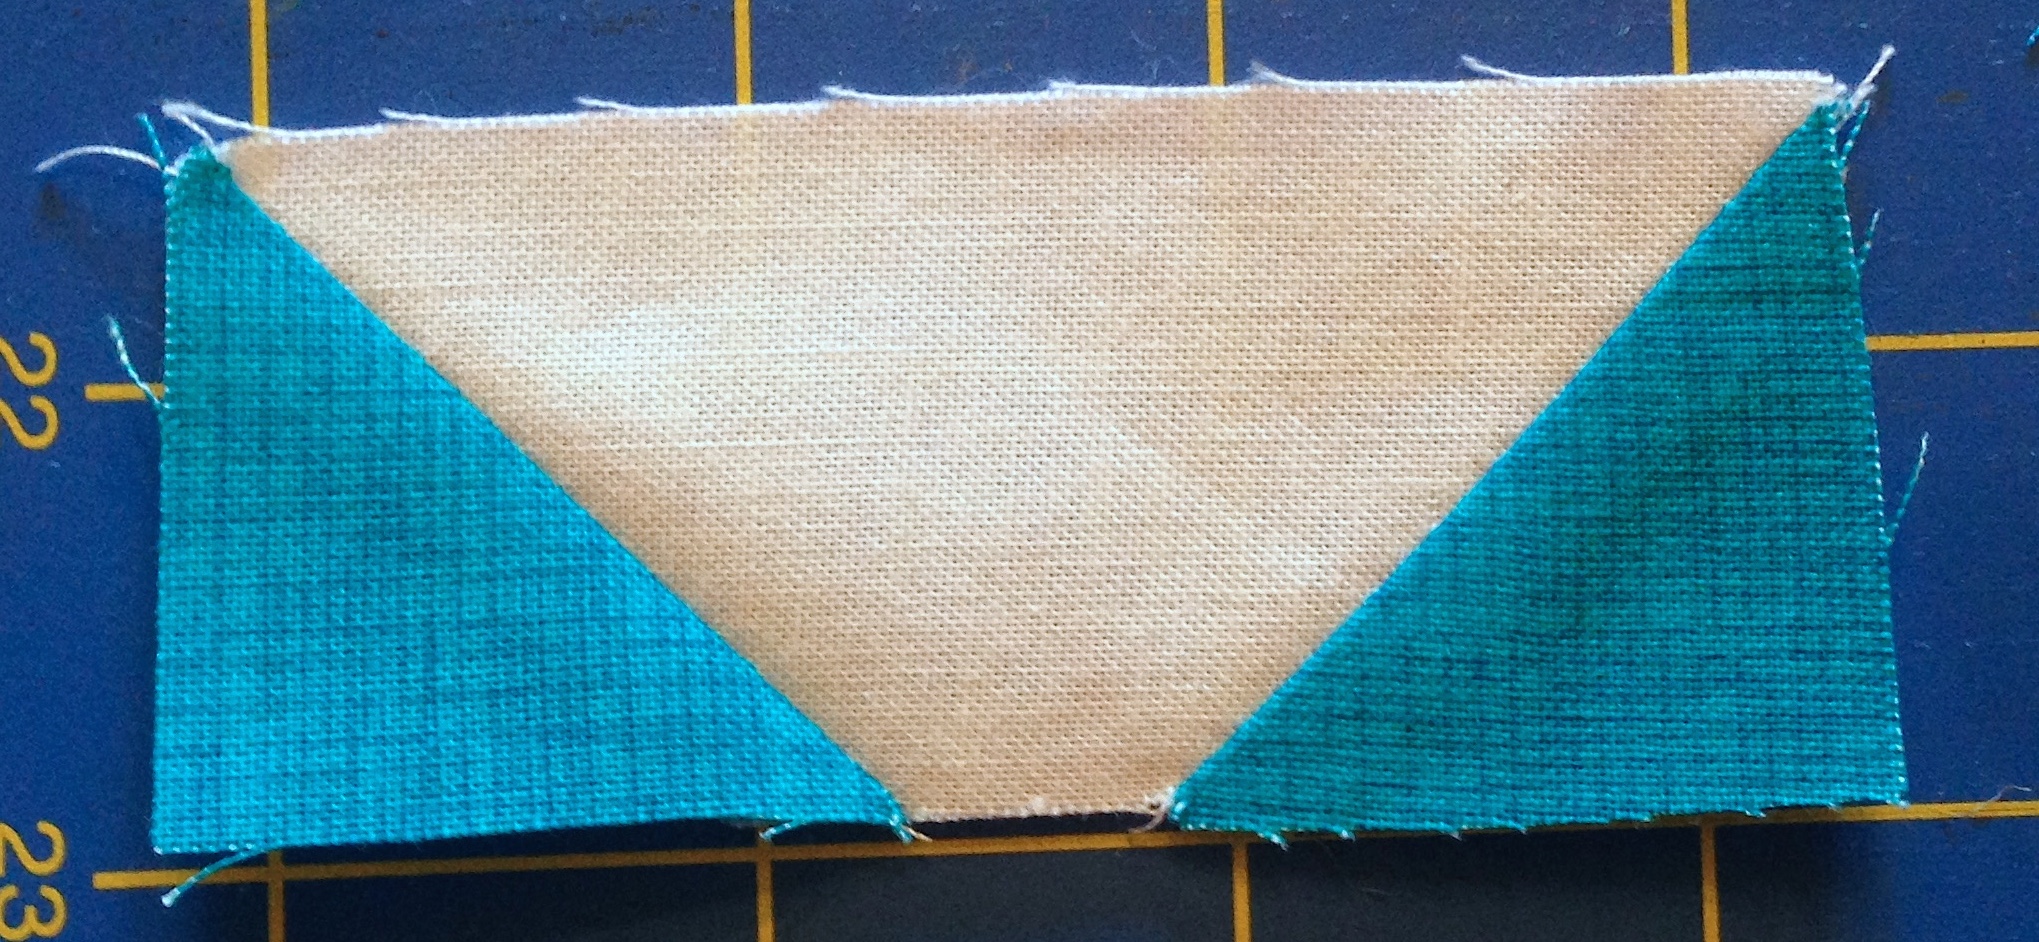
– Flip triangles and press flat.
– Repeat to make 16 ear units.
•••
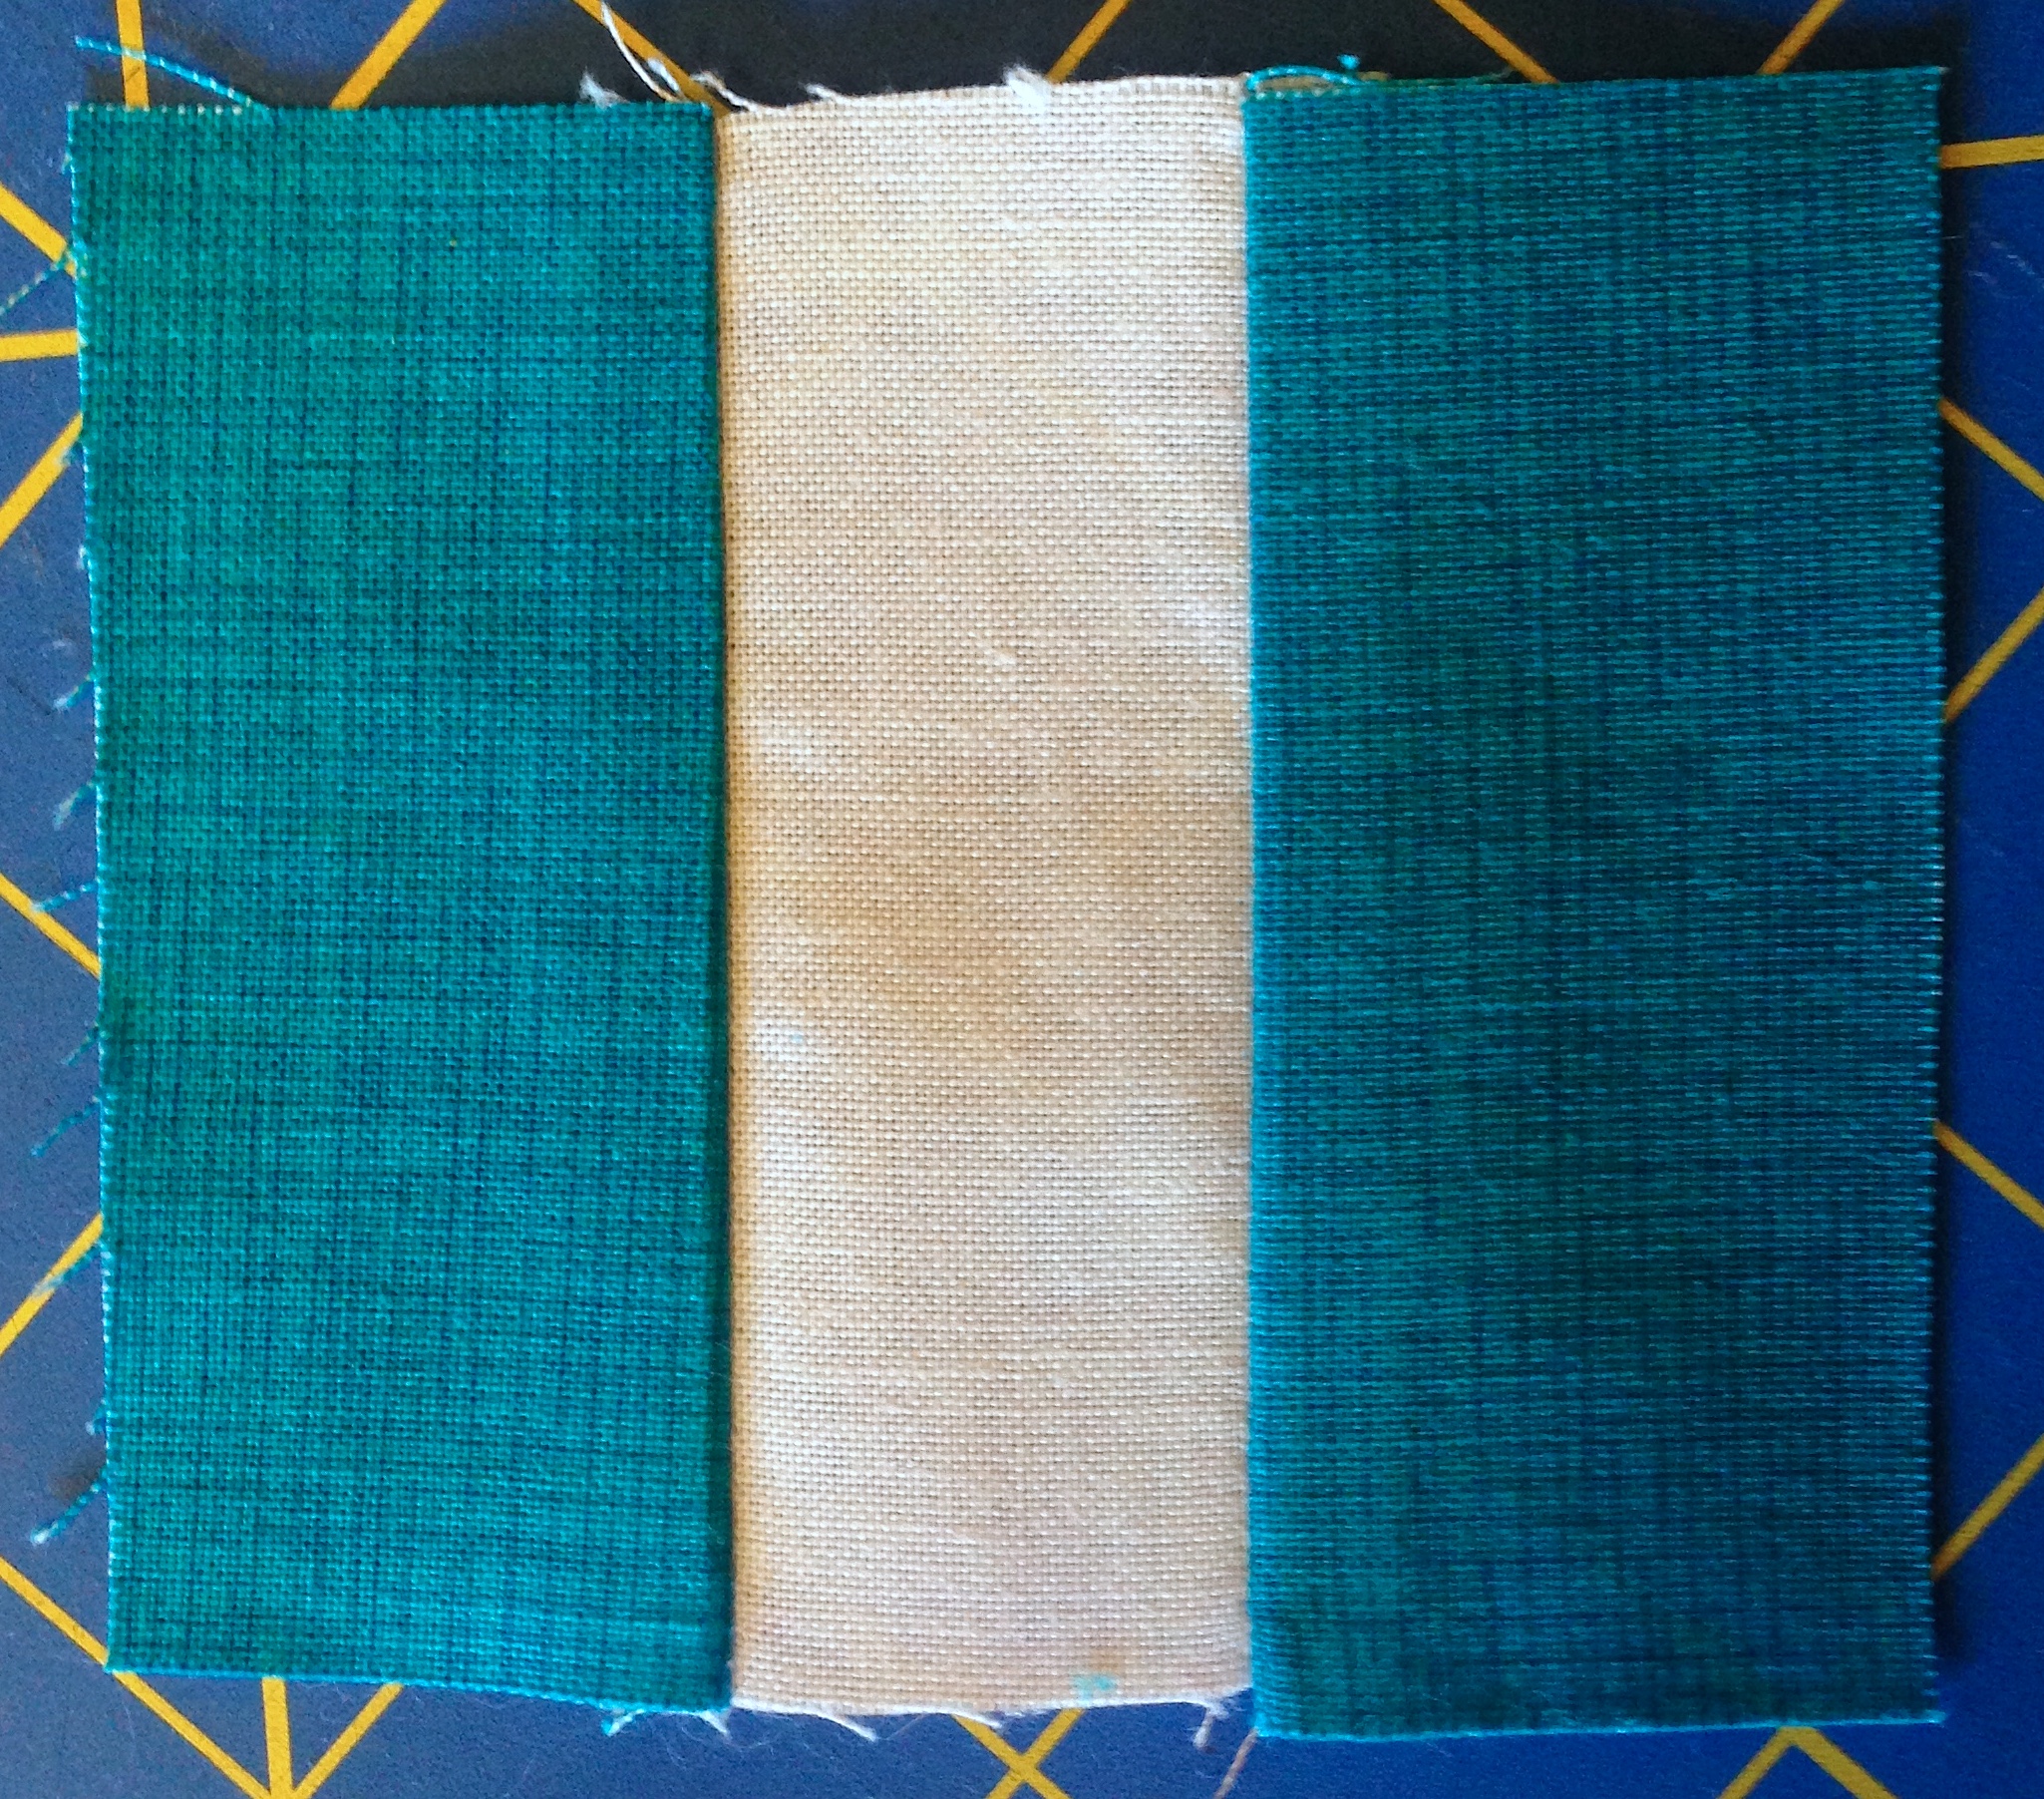
Step 2: Sew Ears to Cat Bodies
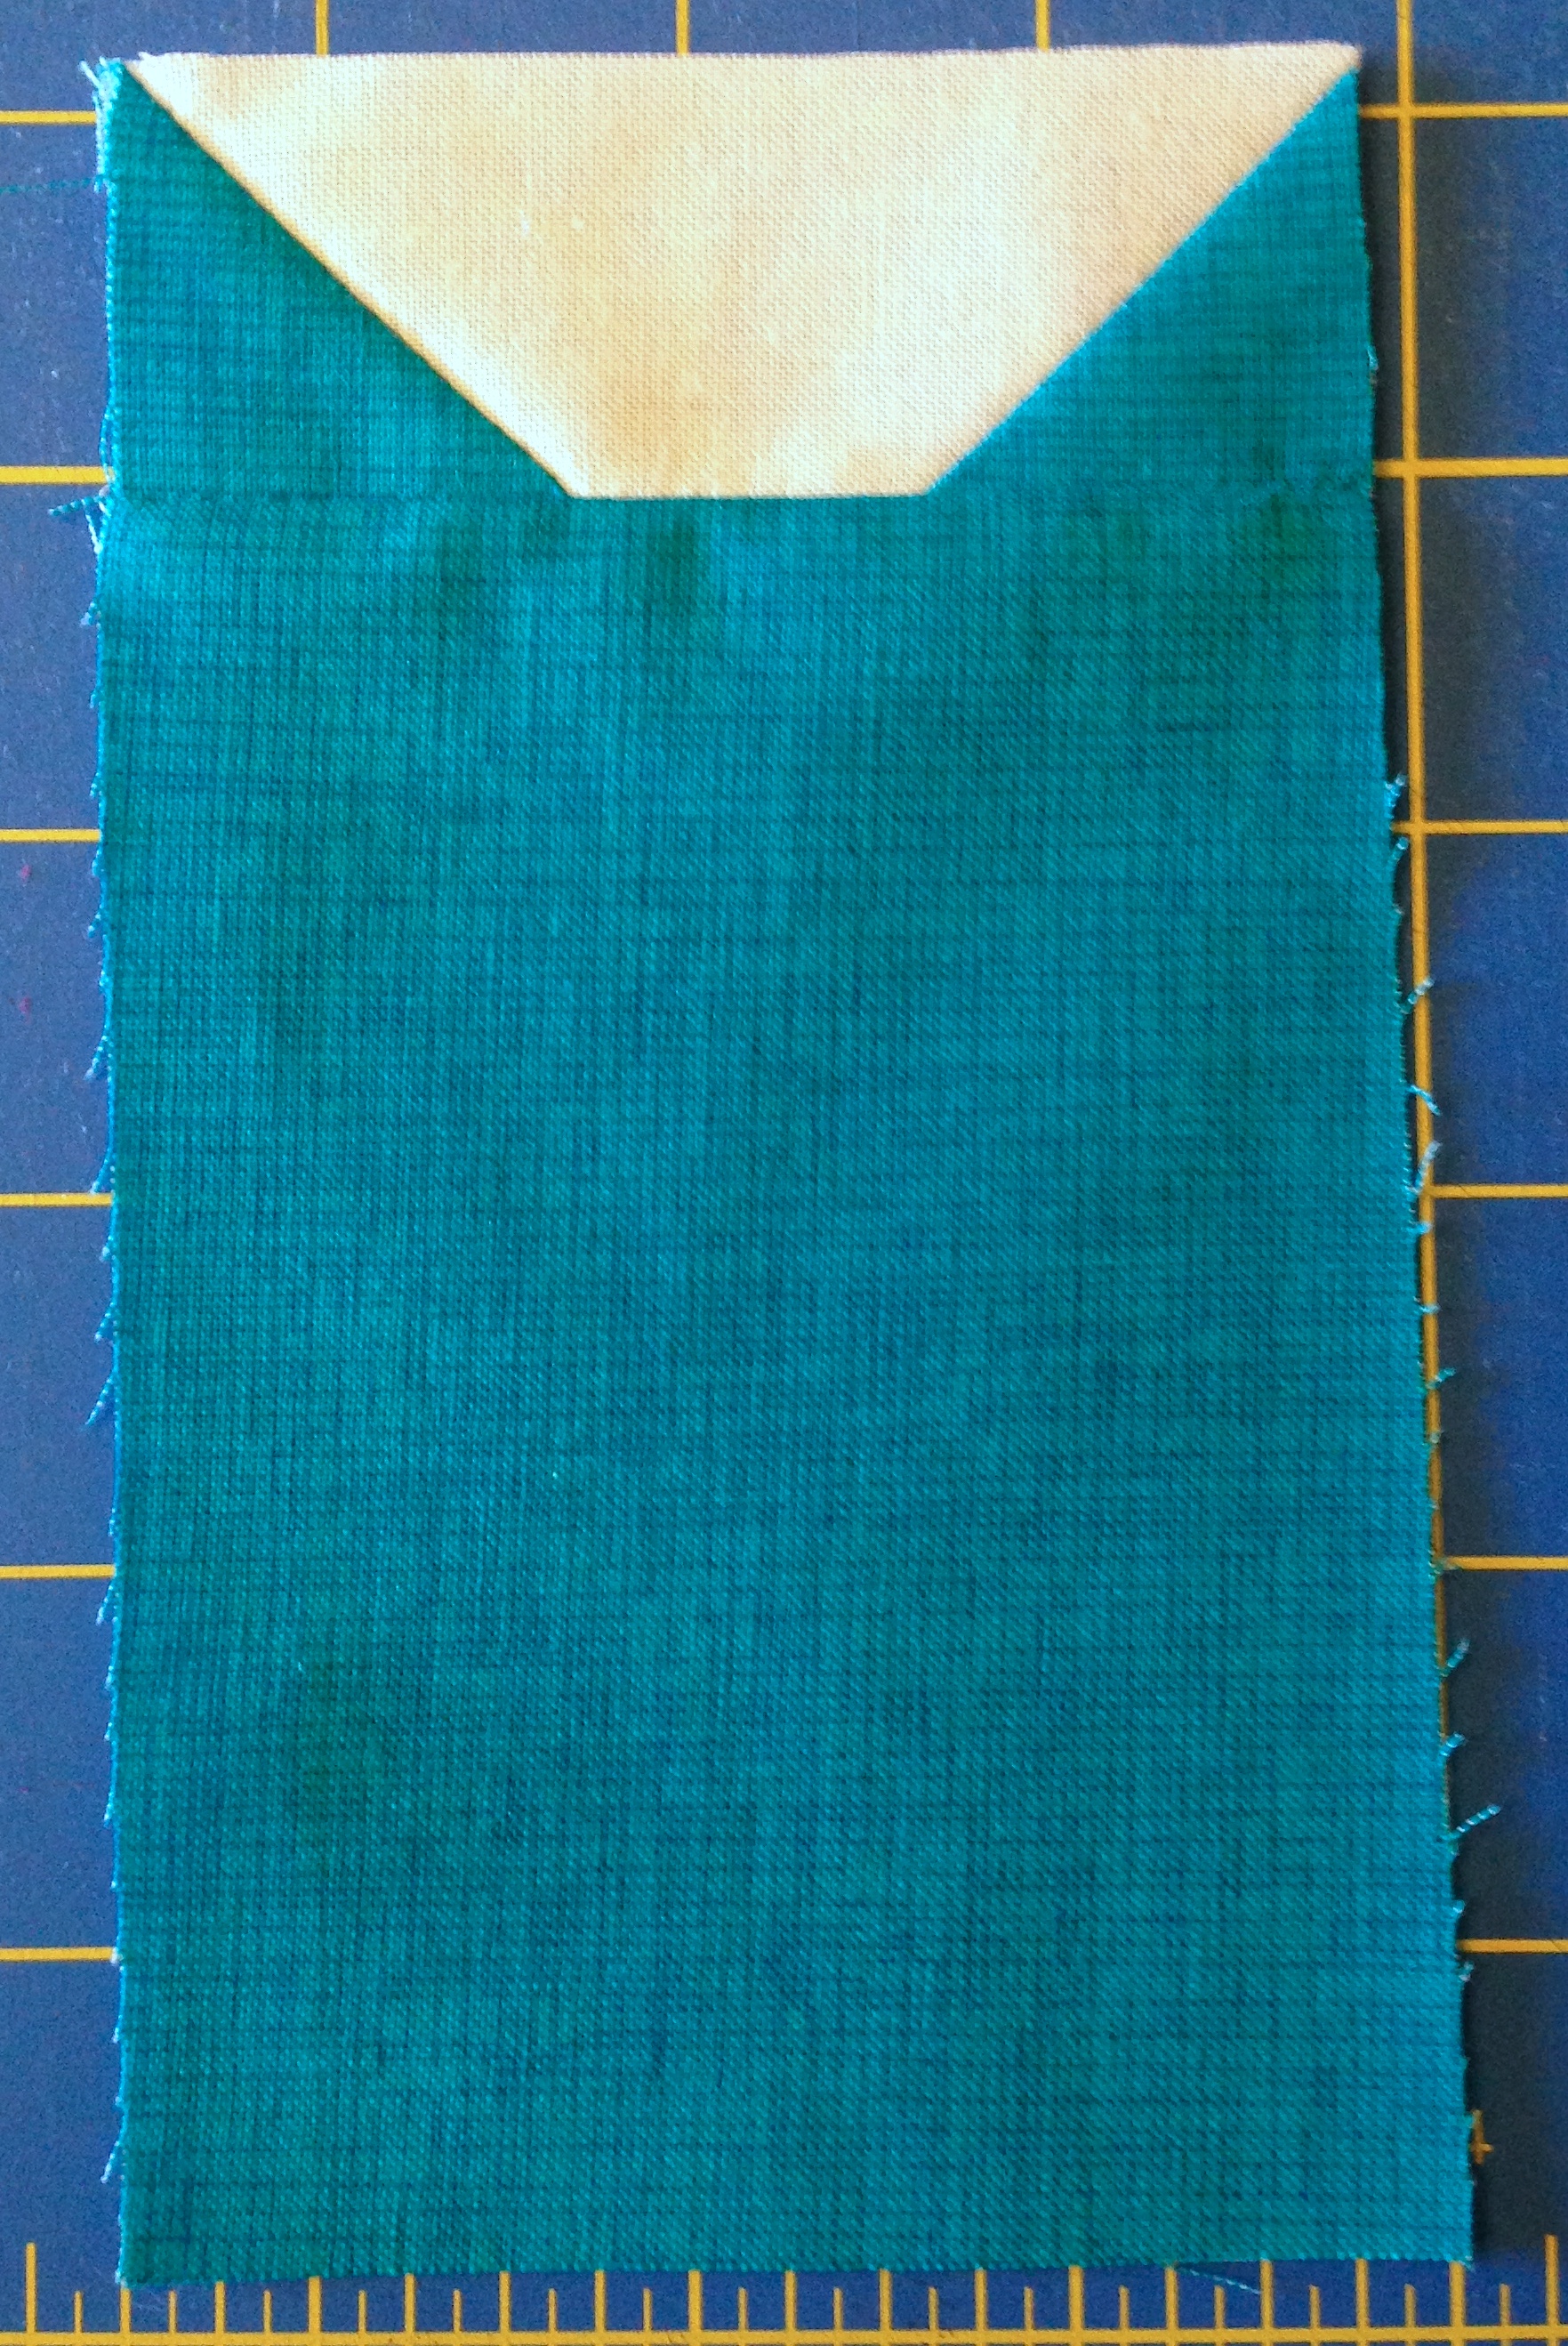
– Sew an ear unit to a matching 3-1/2″ x 5″ rectangle (cat body).

– Repeat to sew all of the ear units to the cat bodies (16 total).
•••
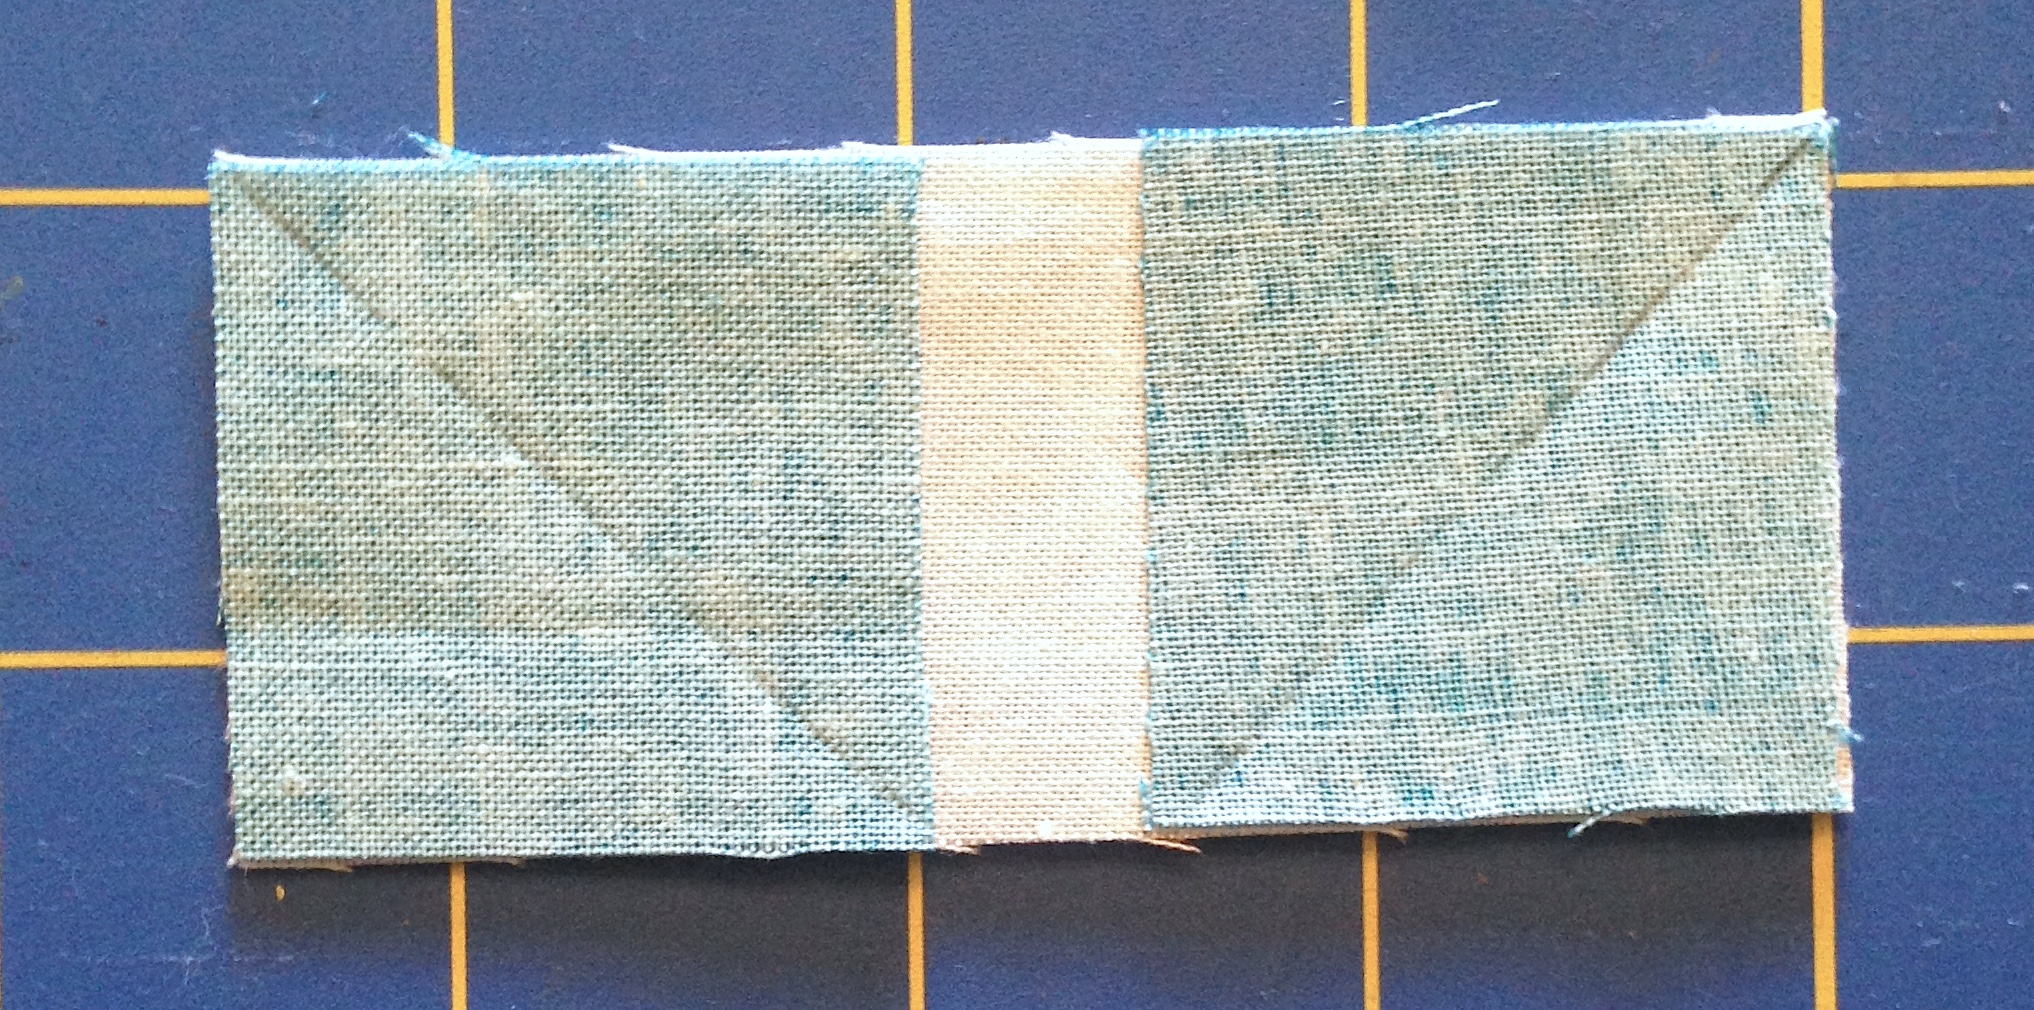
Step 3: Make Leg Units
– Sew two 1-1/2″ x 3″ cat legs to either long side of a 1-1/2″ x 3″ background rectangle.
– Repeat to make 16 leg units.
•••
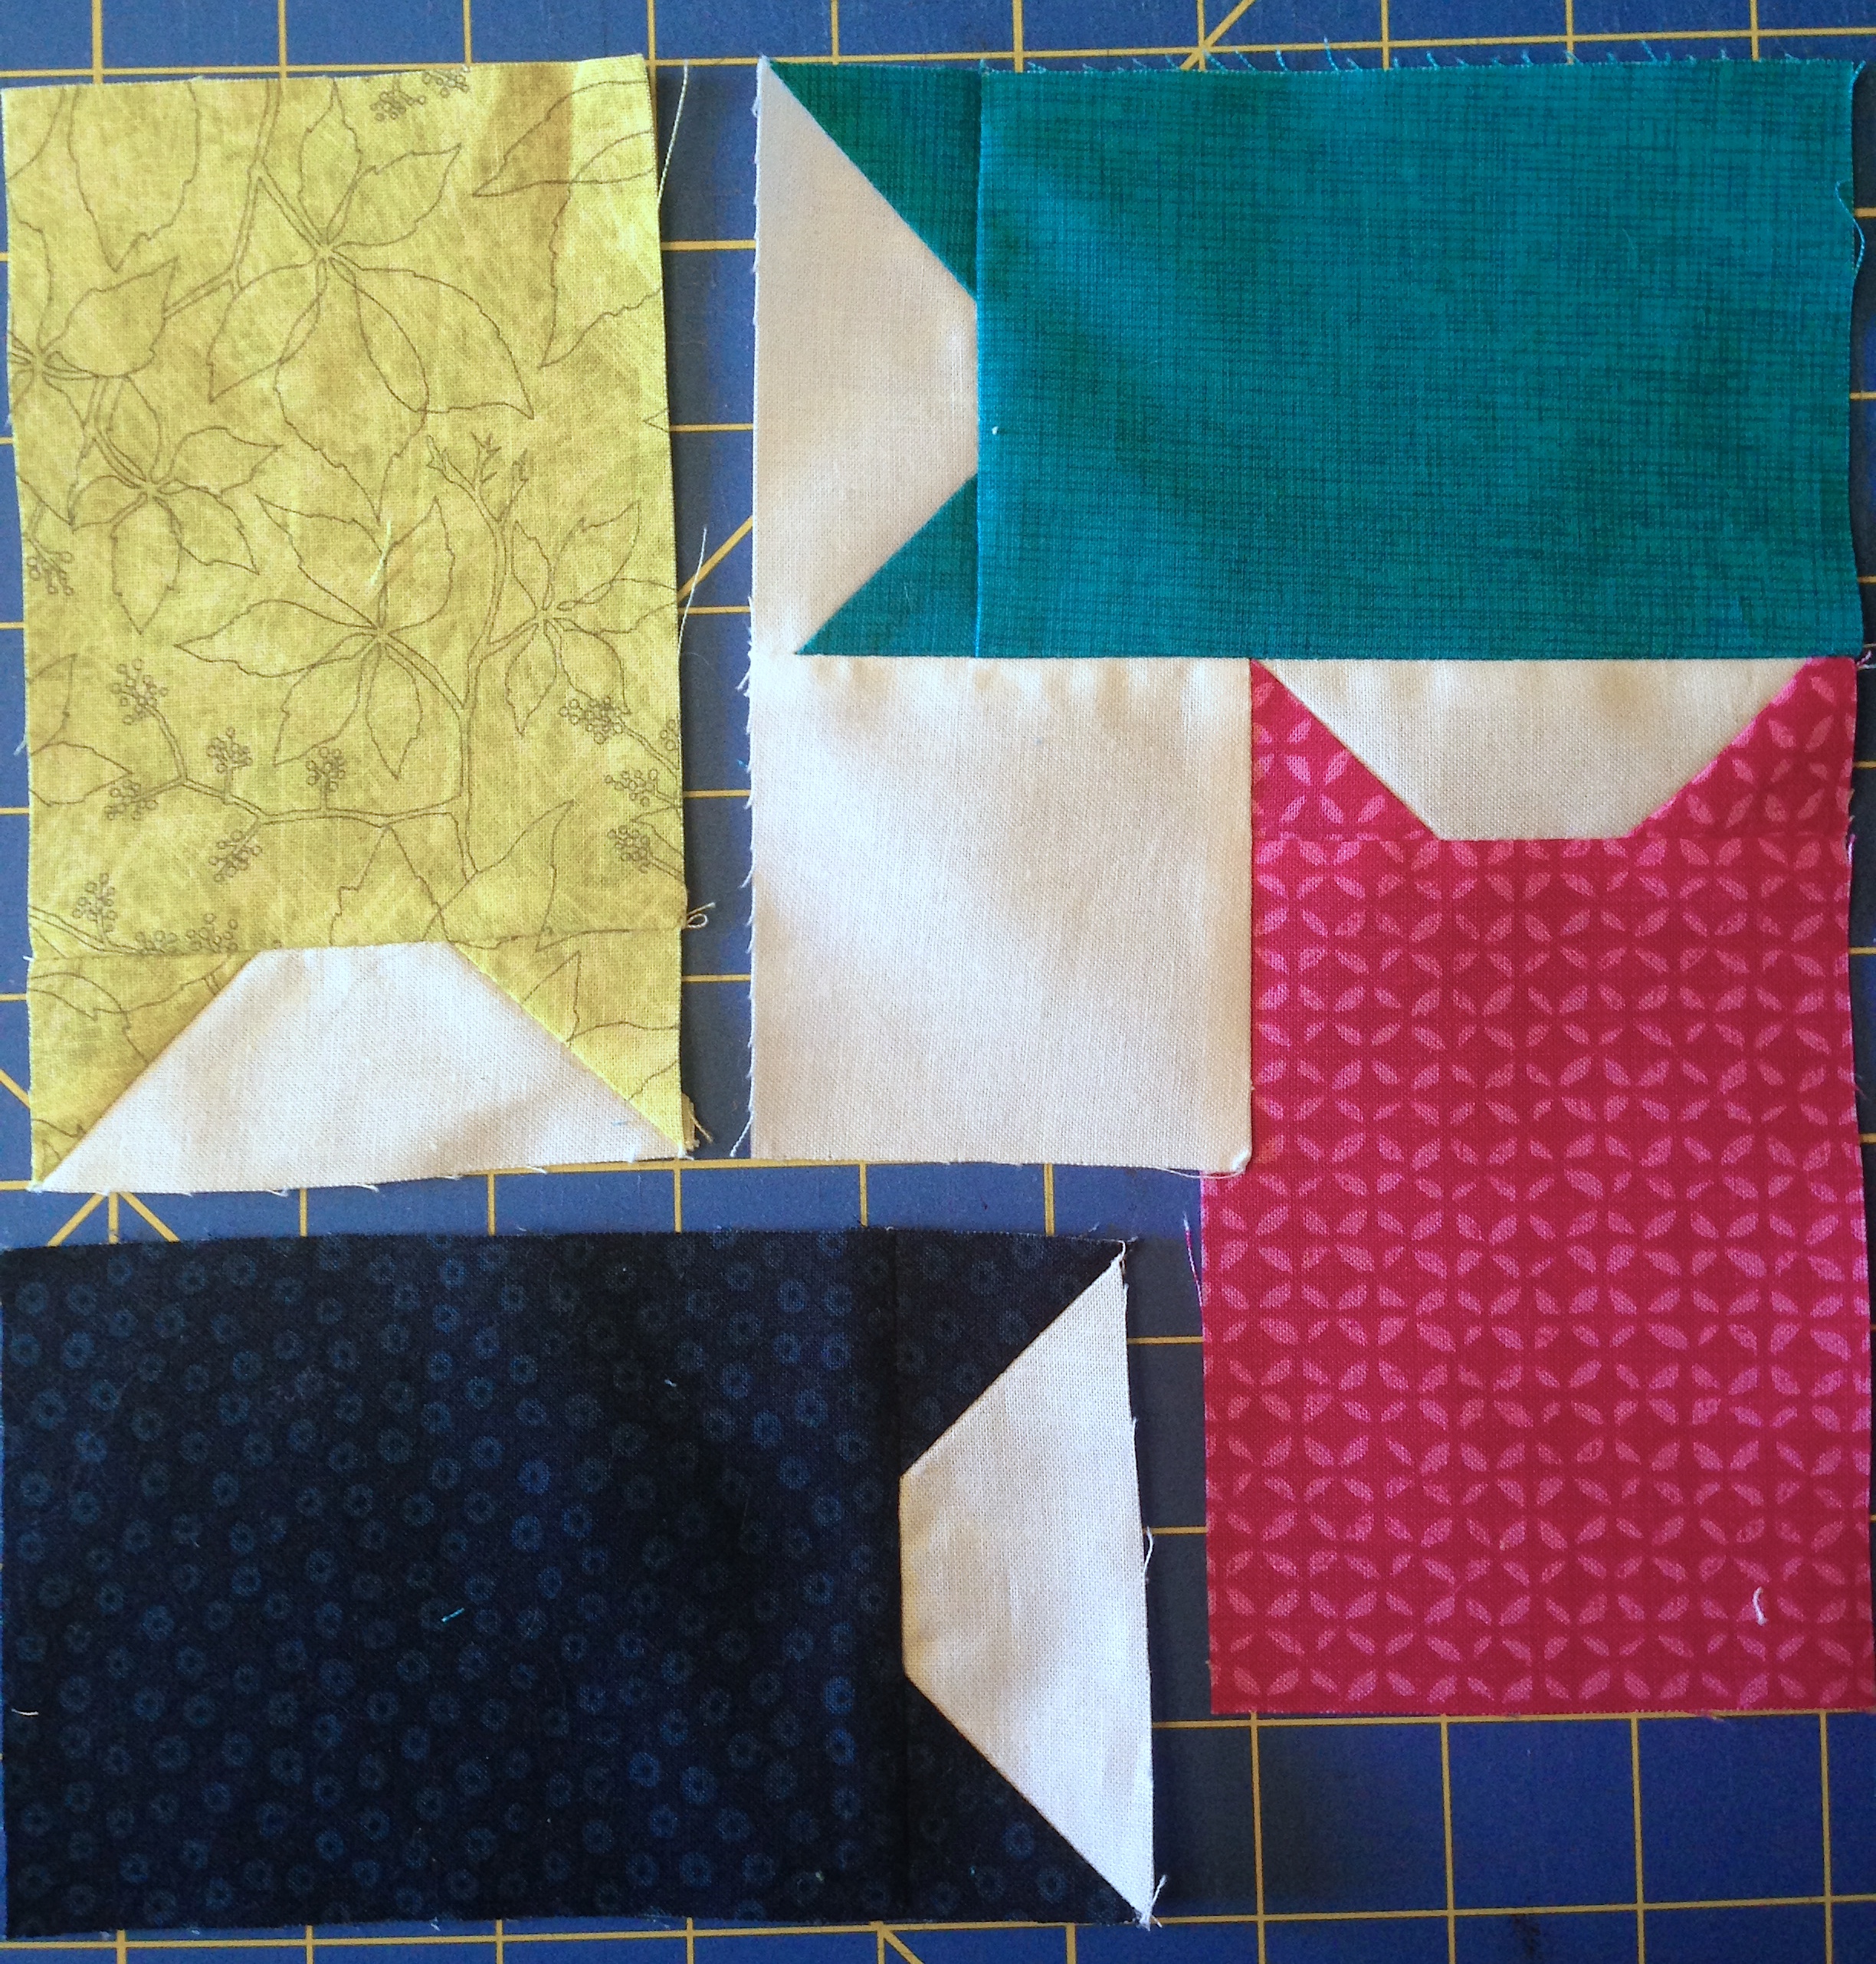
Step 4: Assemble Cat Block
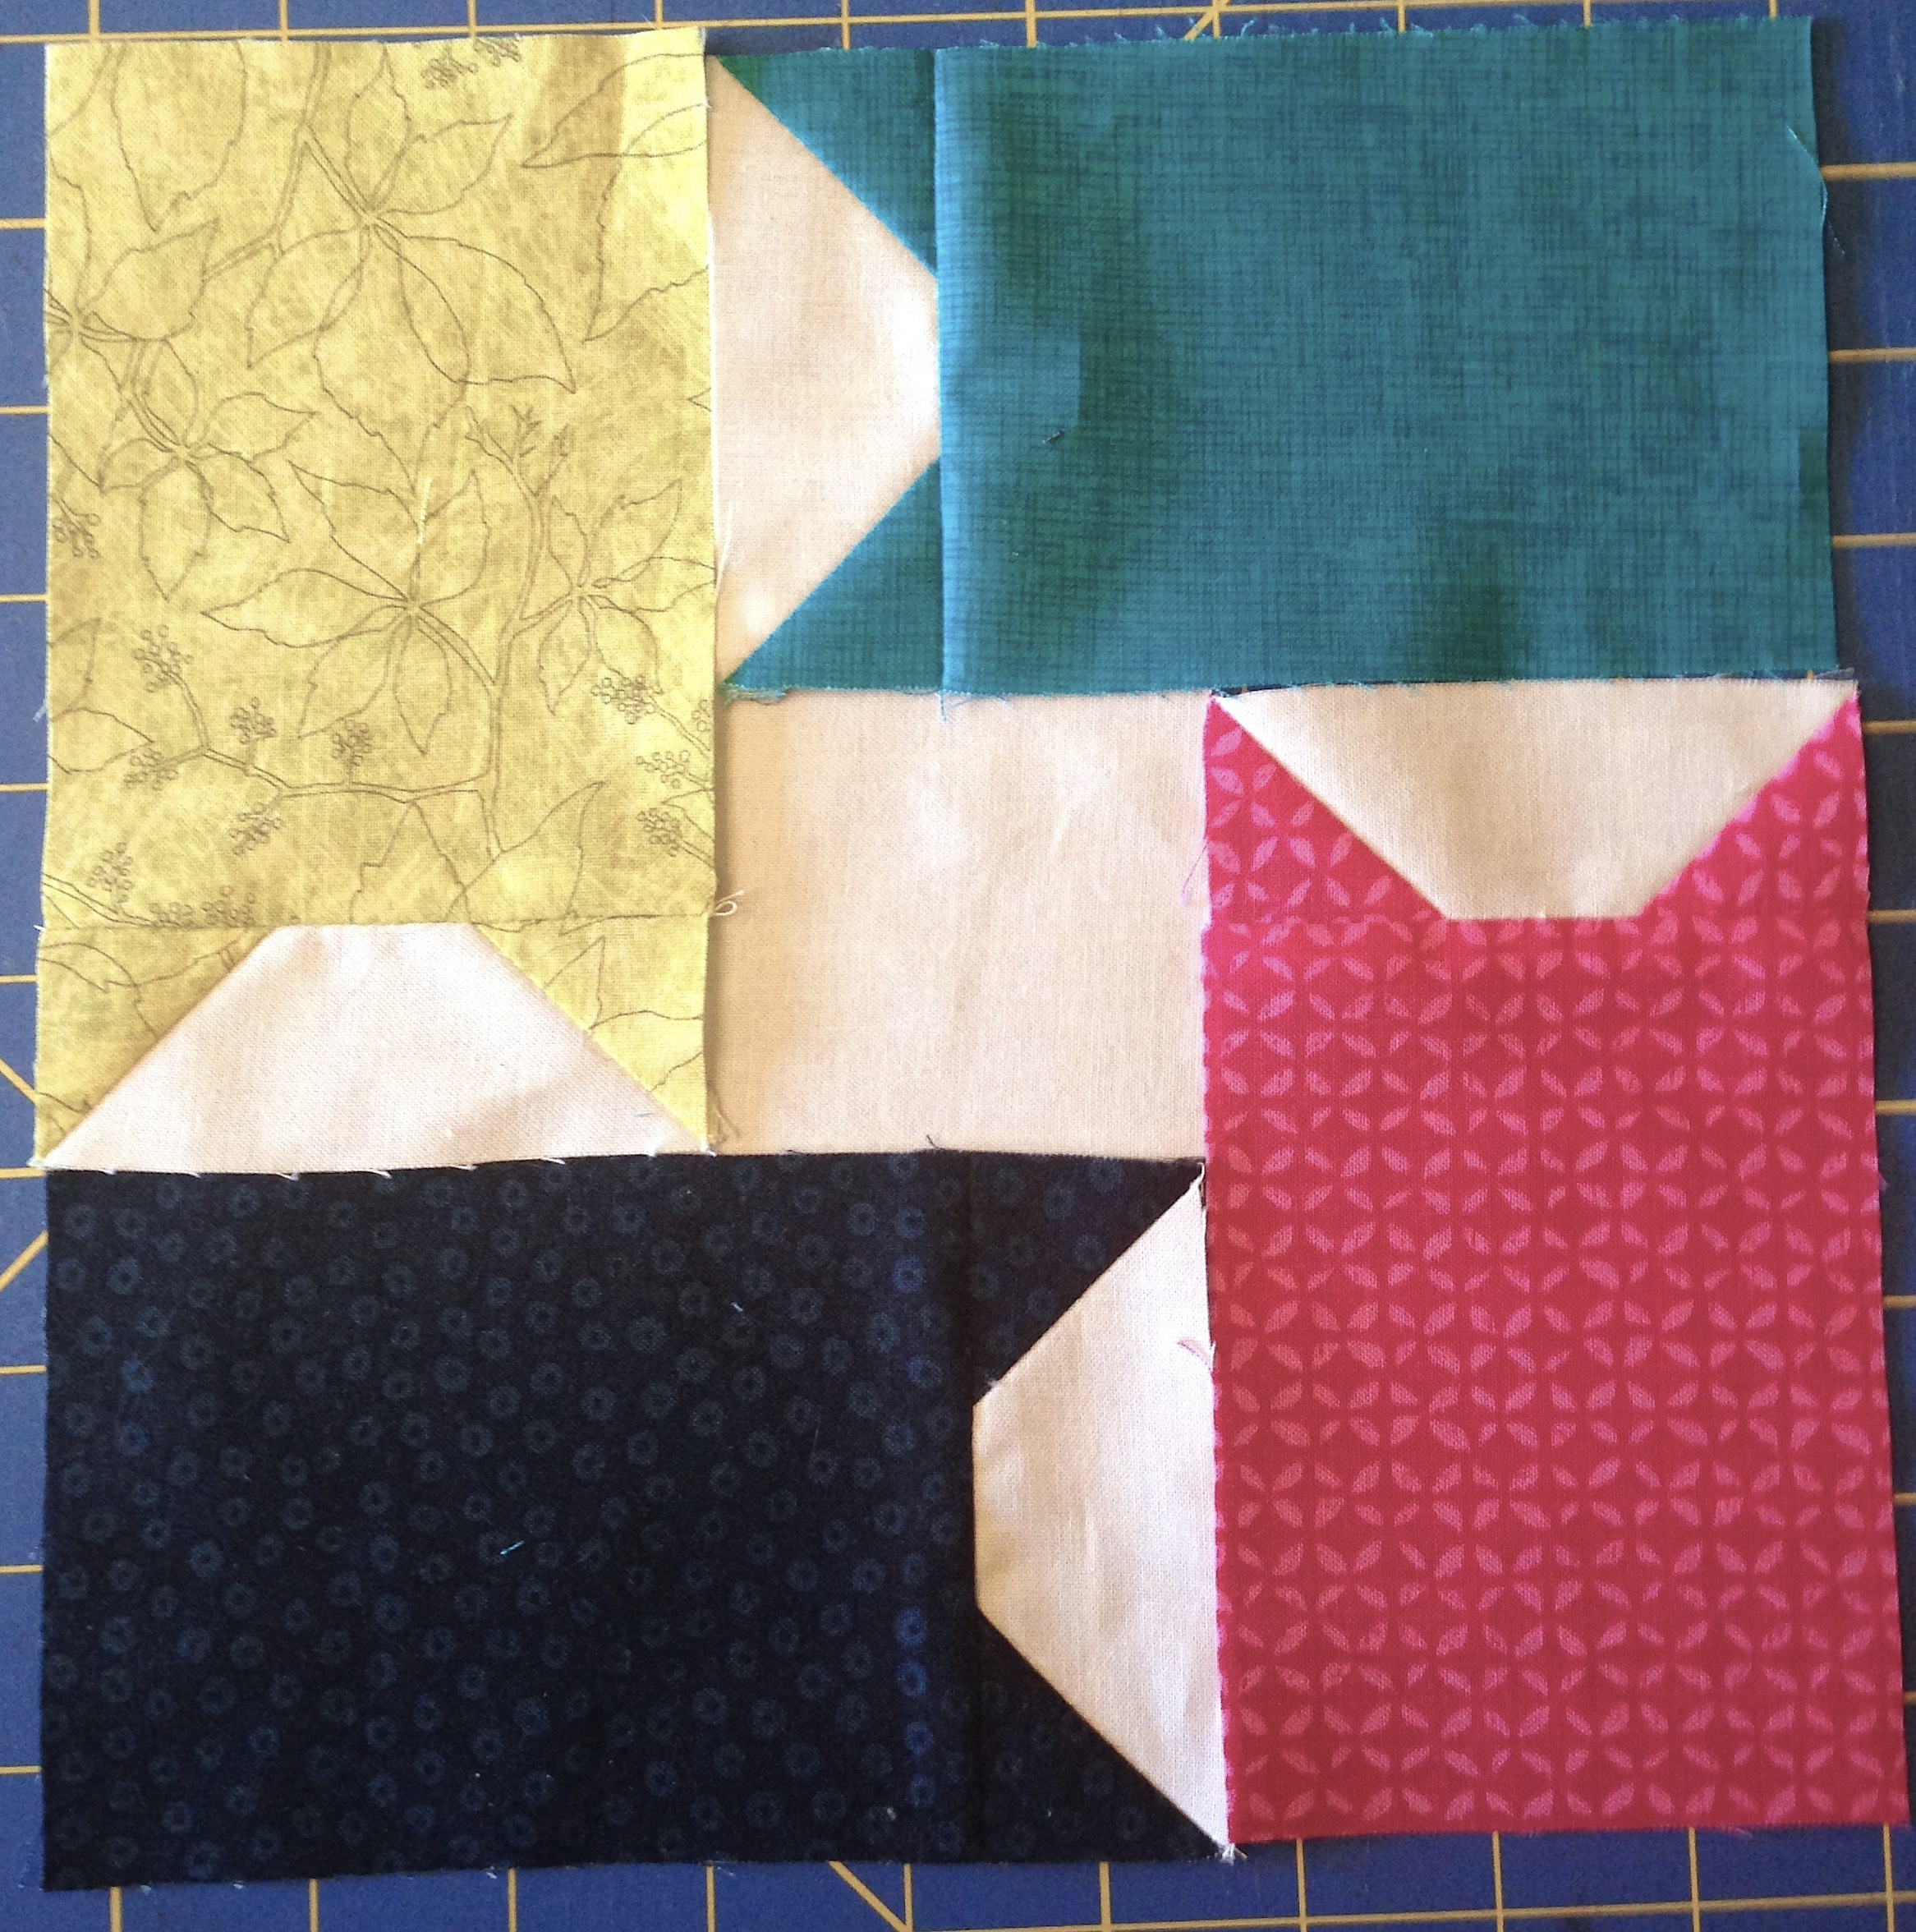
– Lay out four cat blocks as pictured above, with a 3″ x 3″ background square in the center.
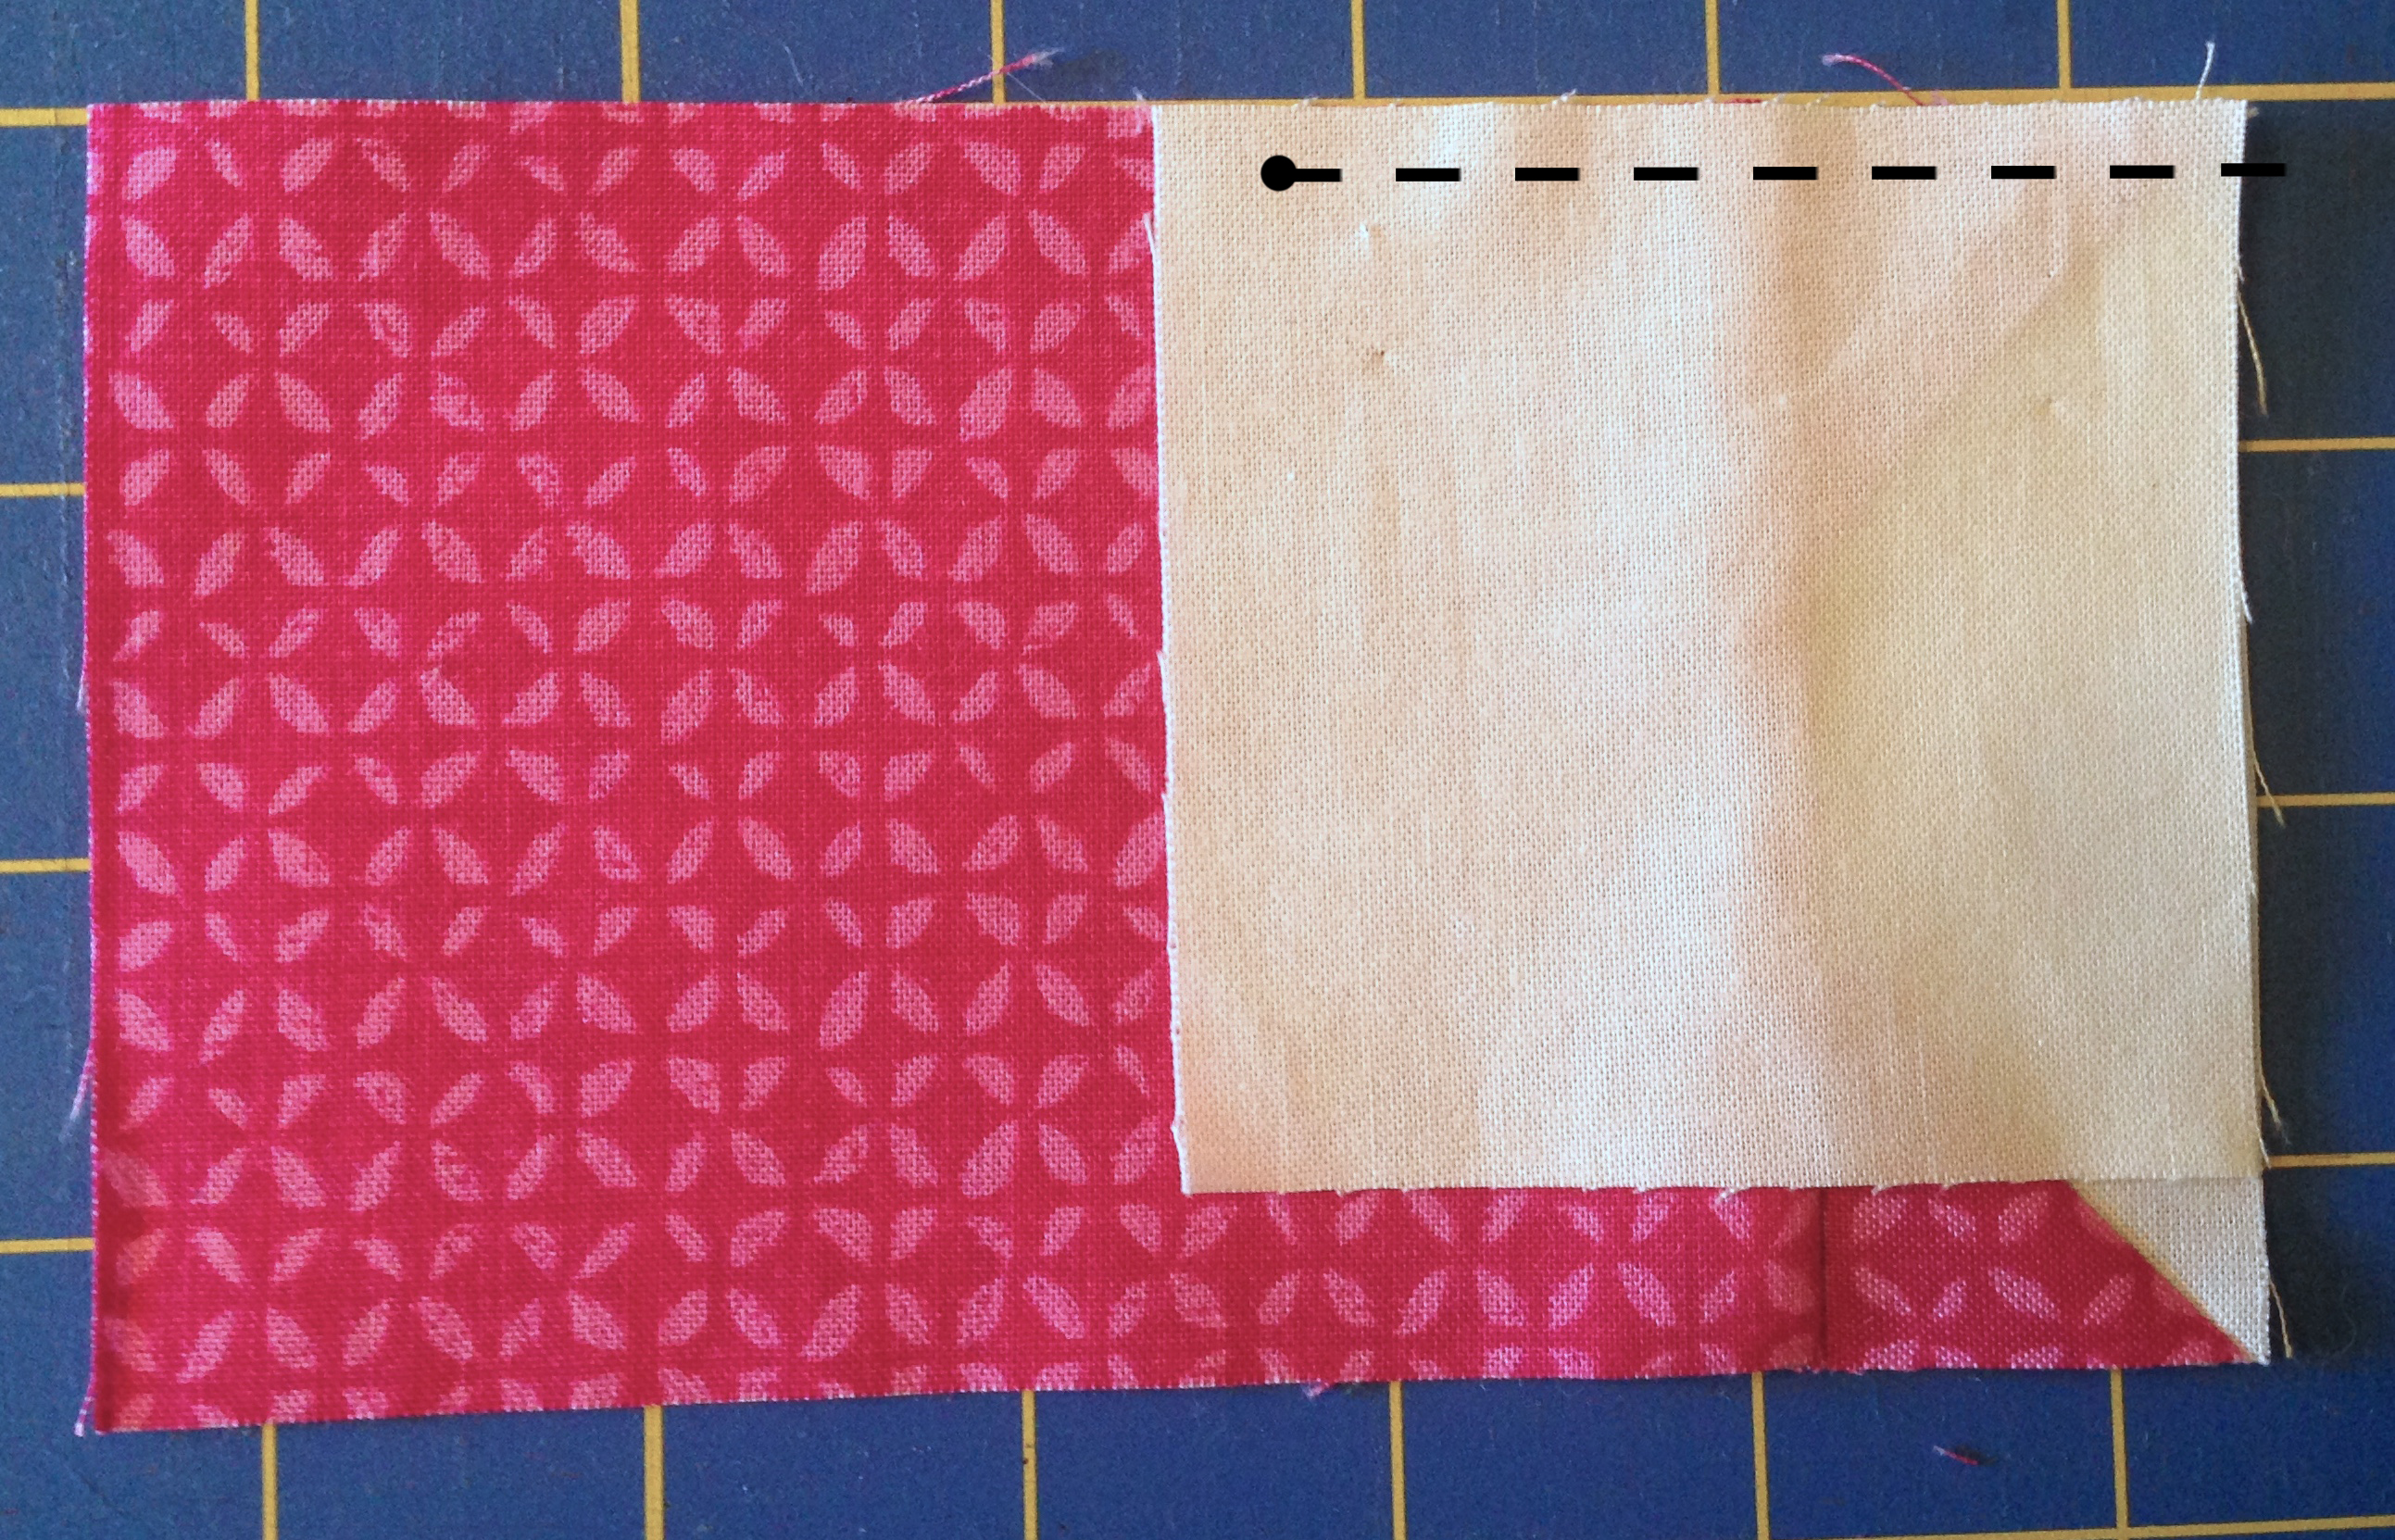
– Begin with the cat unit on the right. Place the center square right sides together on the cat unit, as pictured. Sew together stopping 1/2″ before the inner corner.
– Sew the top cat unit on next, then the cat unit on the left side.
– To finish the block, you will need to fold the cat unit on the right side out of the way, sew the bottom cat, then sew the remaining part of the right cat unit.
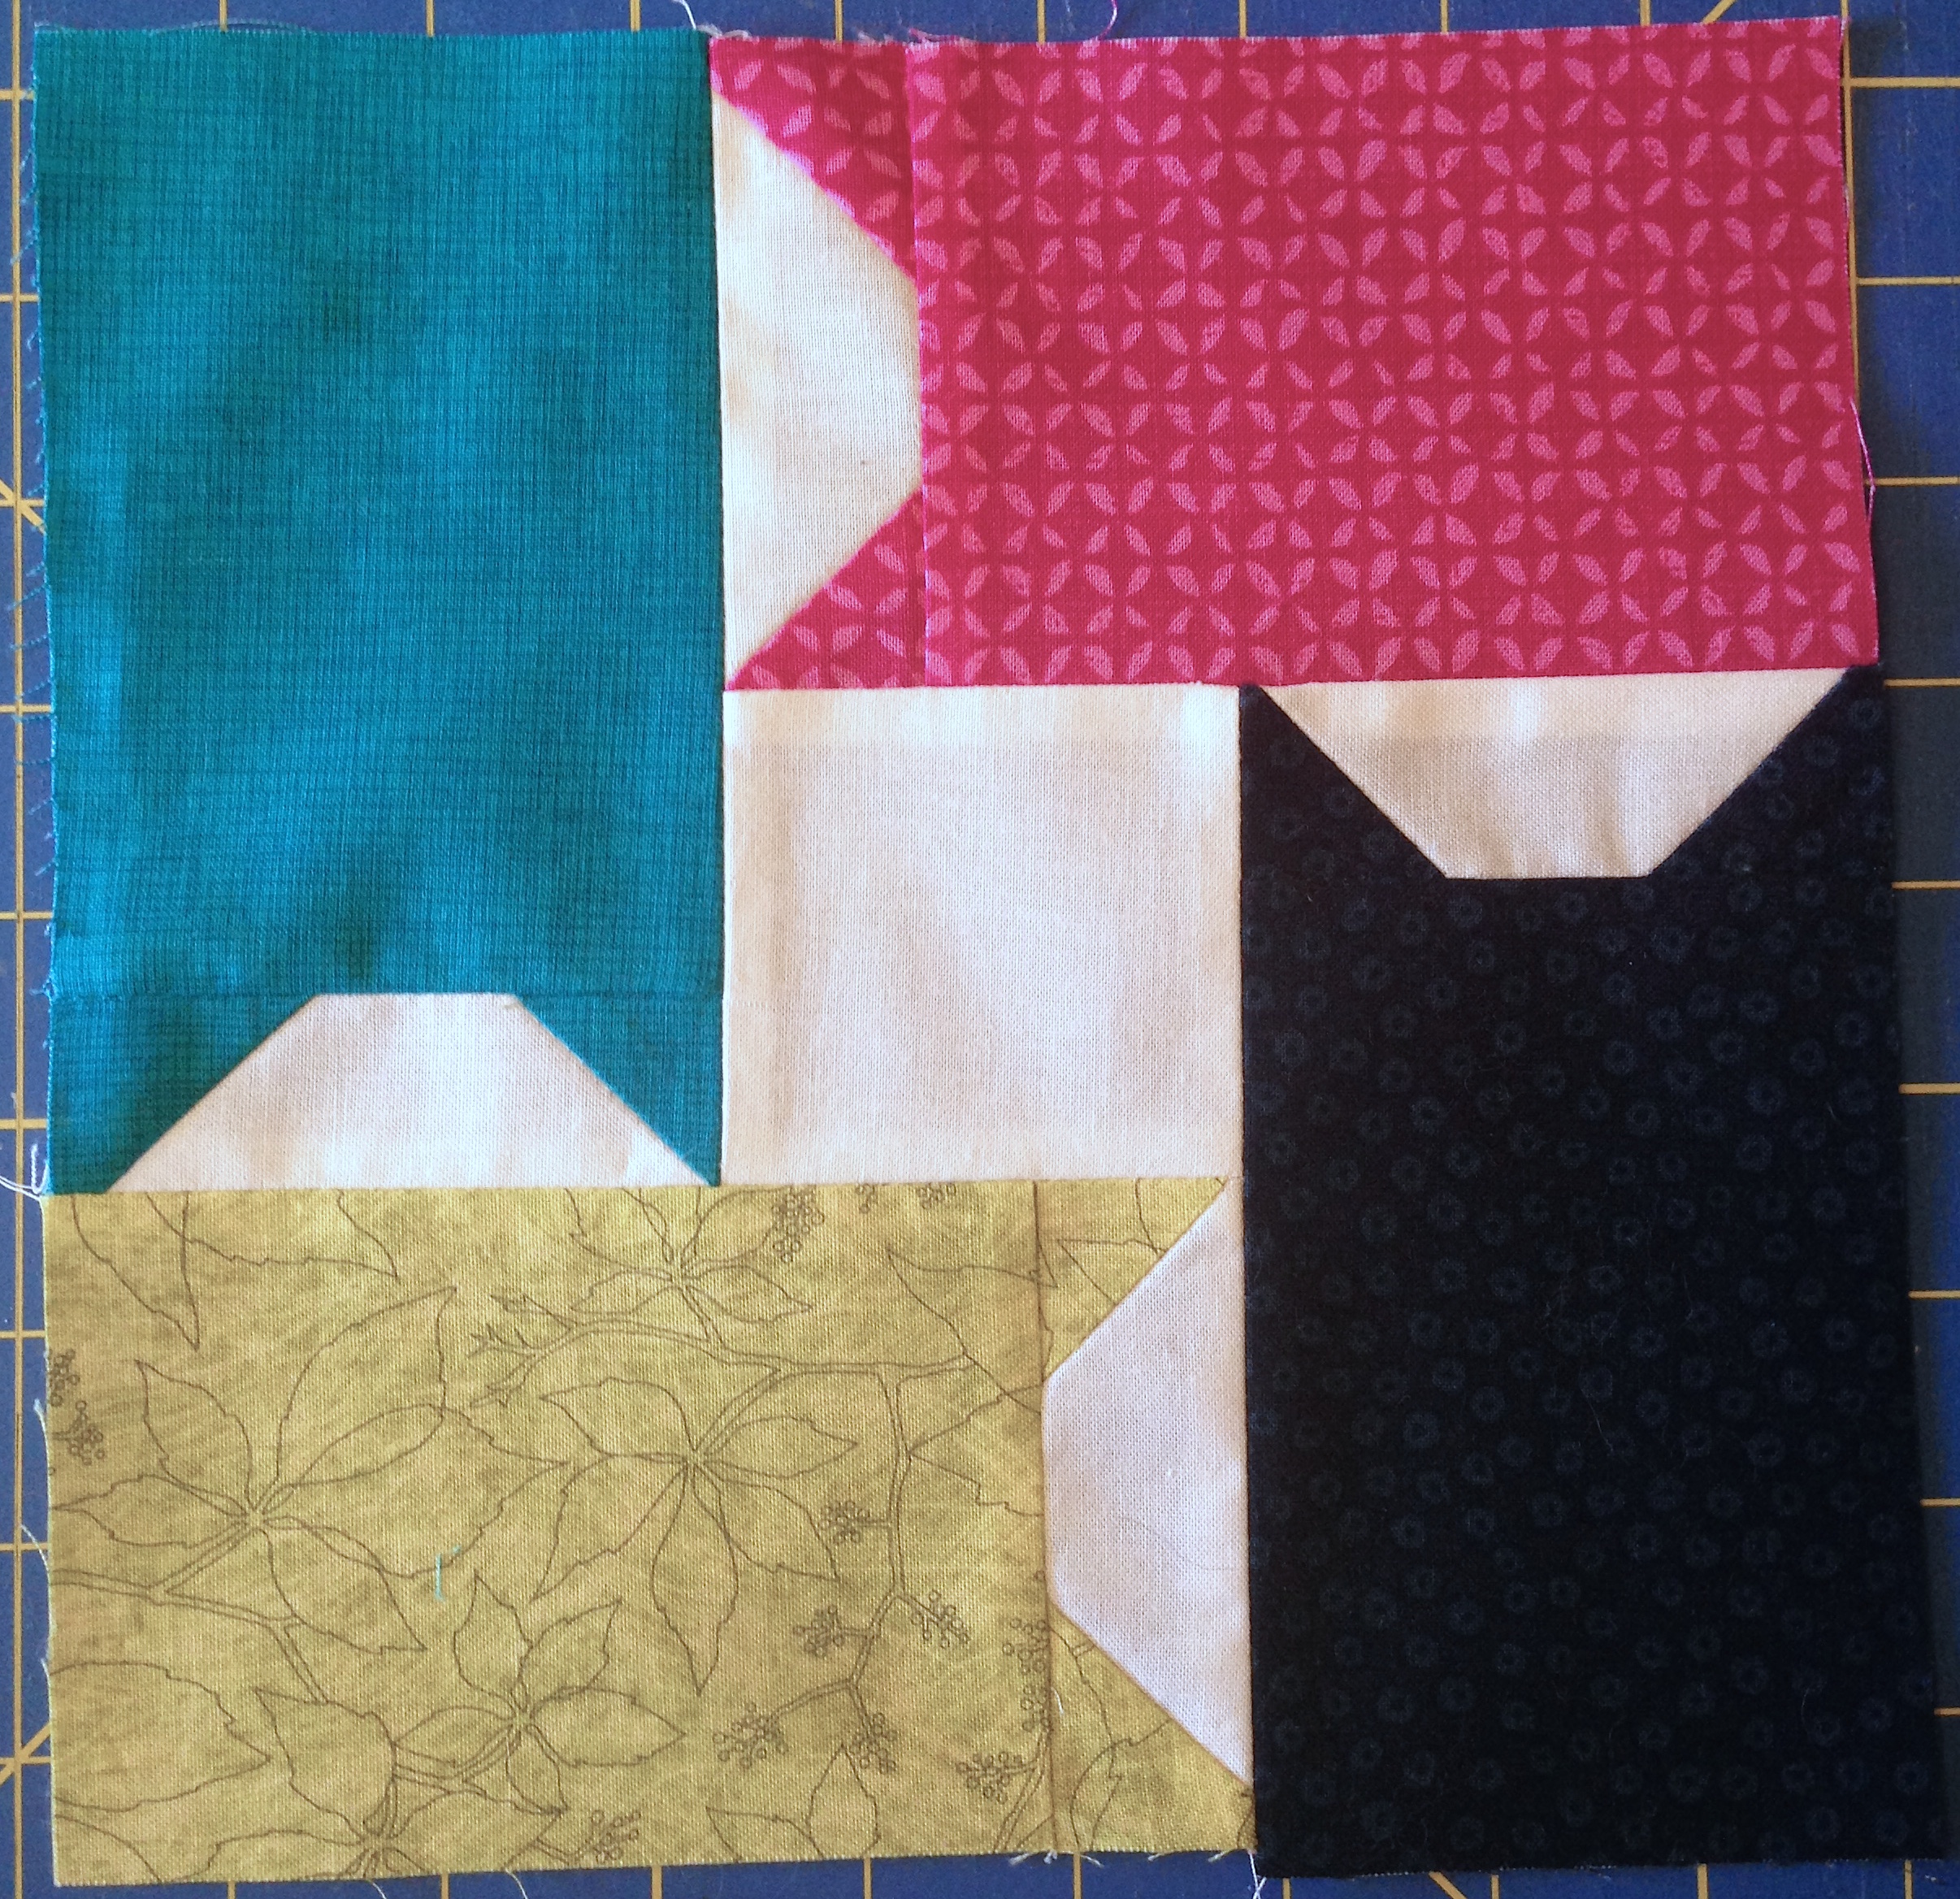
– Repeat Step 4 to make three more Cat Blocks.
•••
Step 5: Finishing (Attach Sashing and Borders)
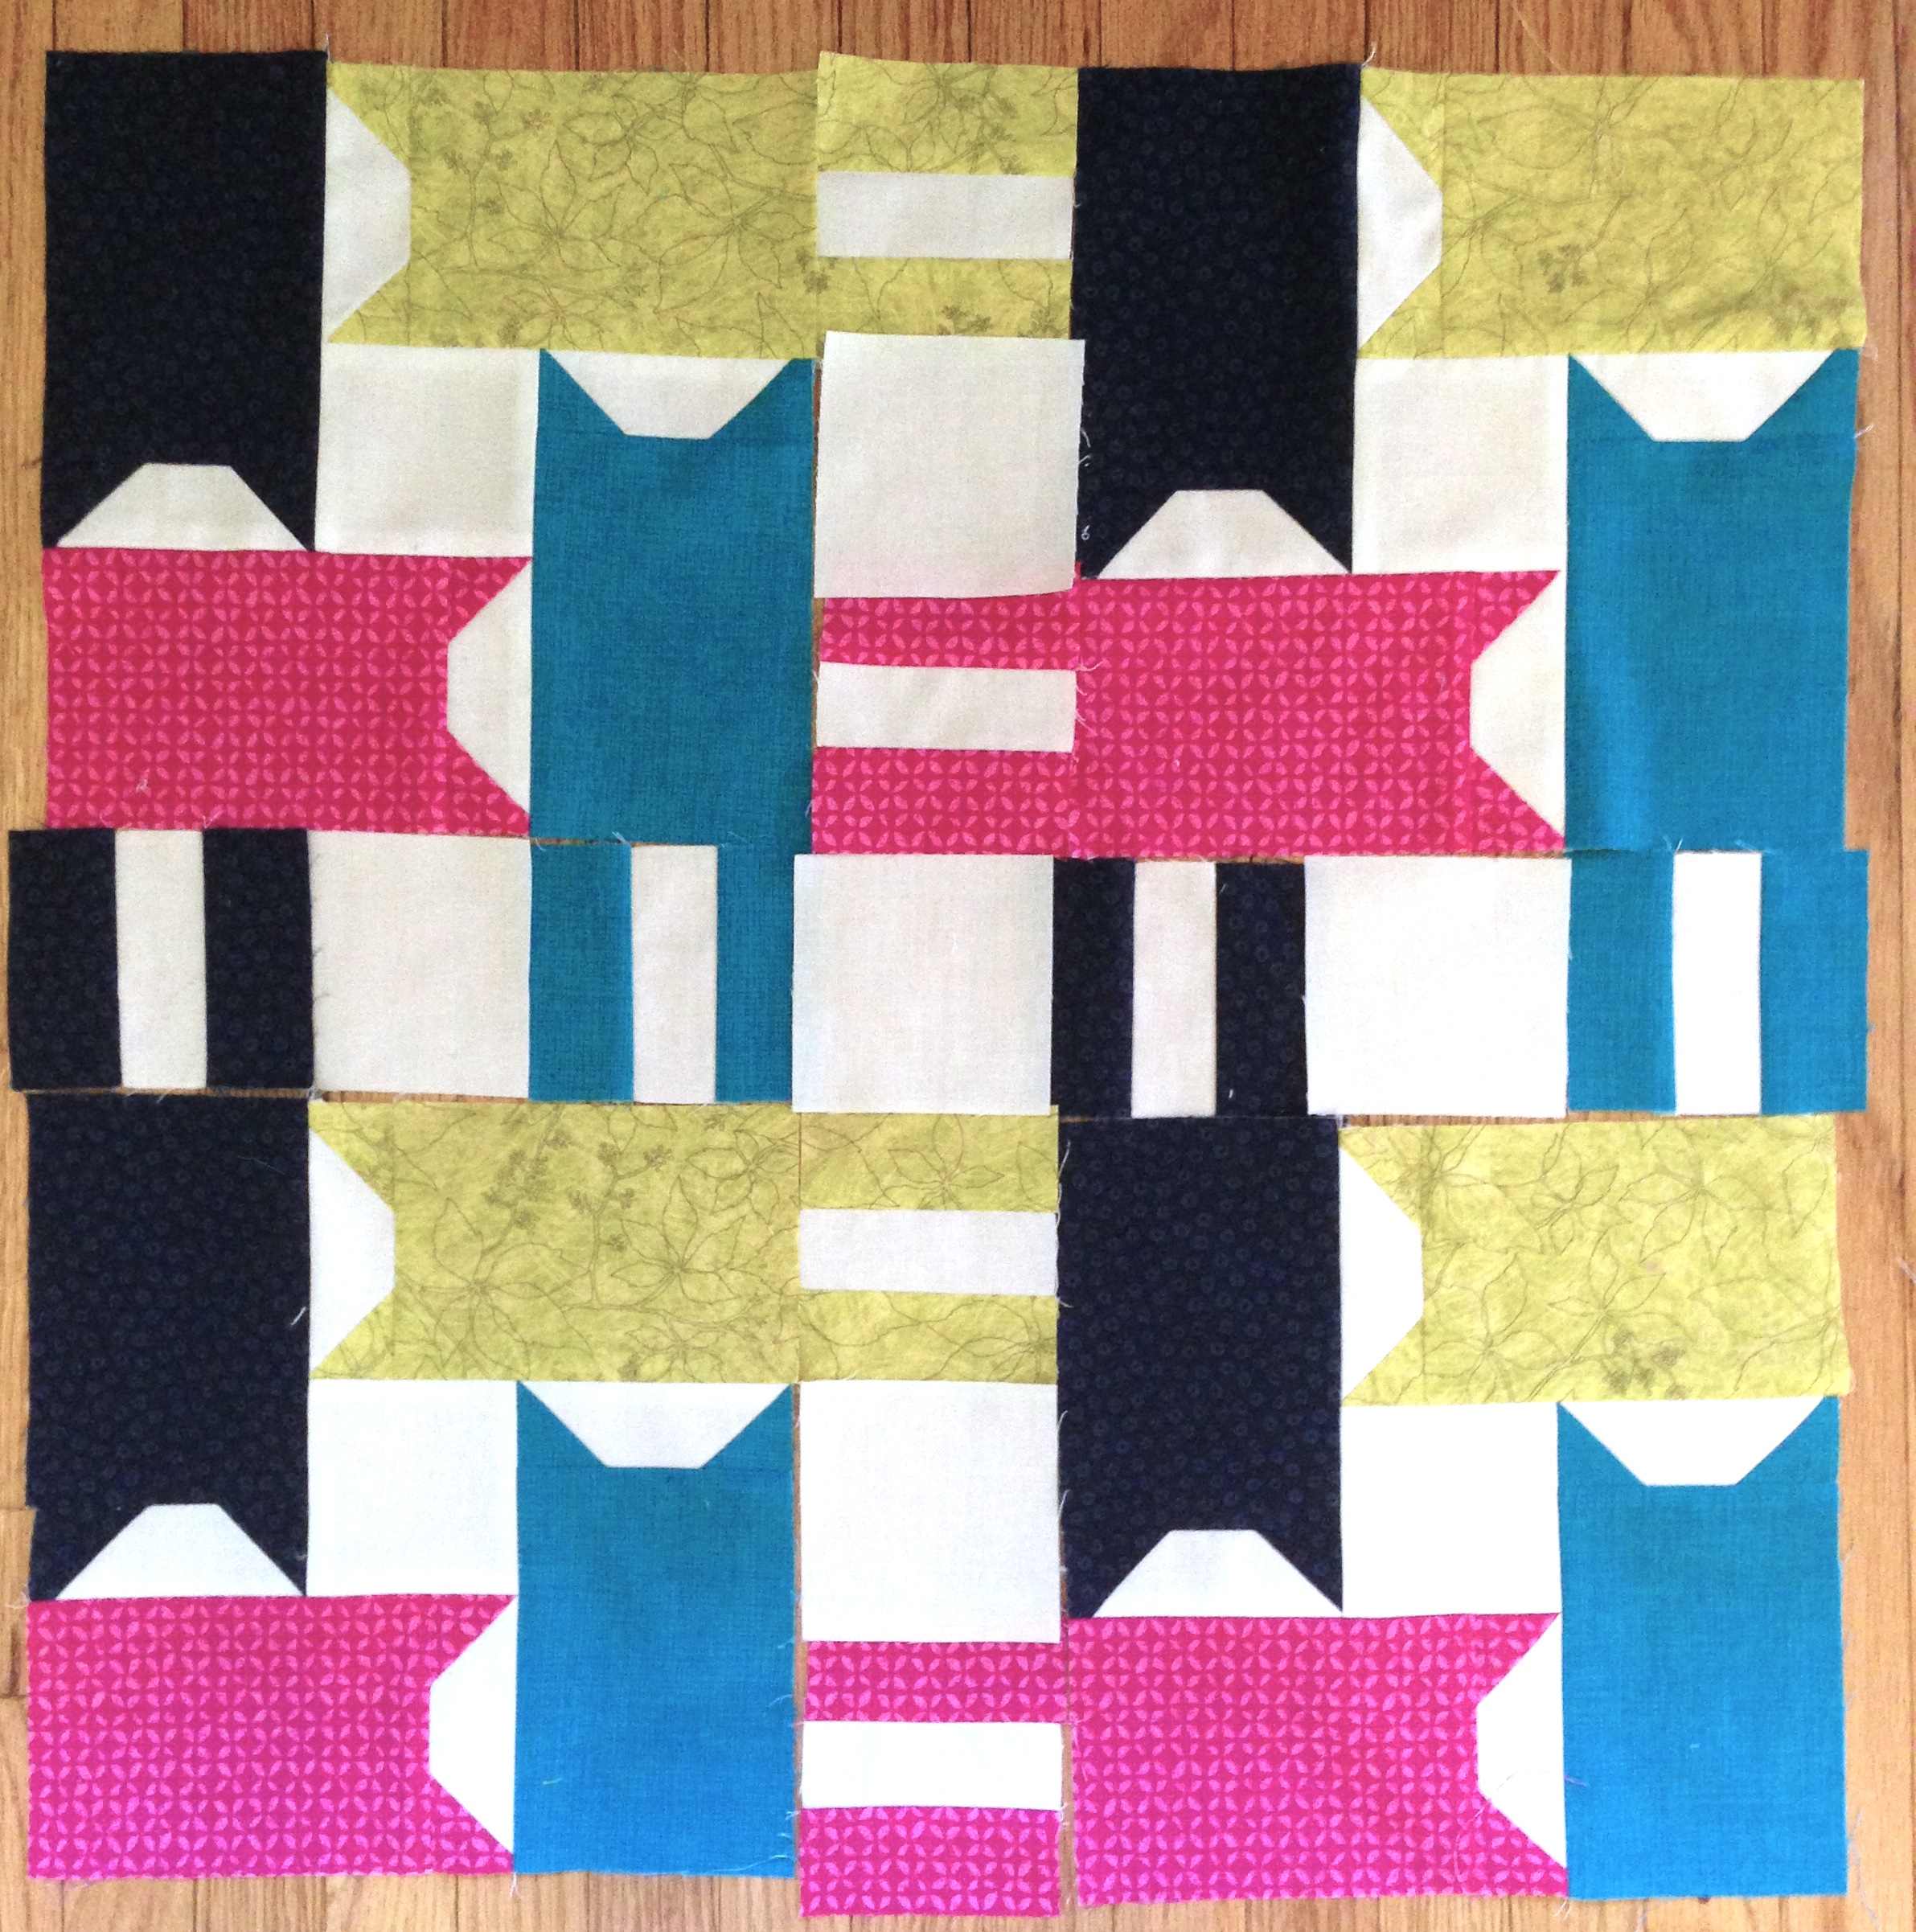
– Lay the four blocks out however you would like them to be oriented. Pair legs with the inner facing cats and then place 3″ x 3″ background squares between each leg unit.
– Sew the legs and background squares into strips, as pictured, then sew everything into rows. Sew the rows together to complete the center of the quilt.

Next, sew larger background rectangles and leg units together as pictured to make the borders . Sew the side borders on first and then the top and bottom borders.
You are done!
•••
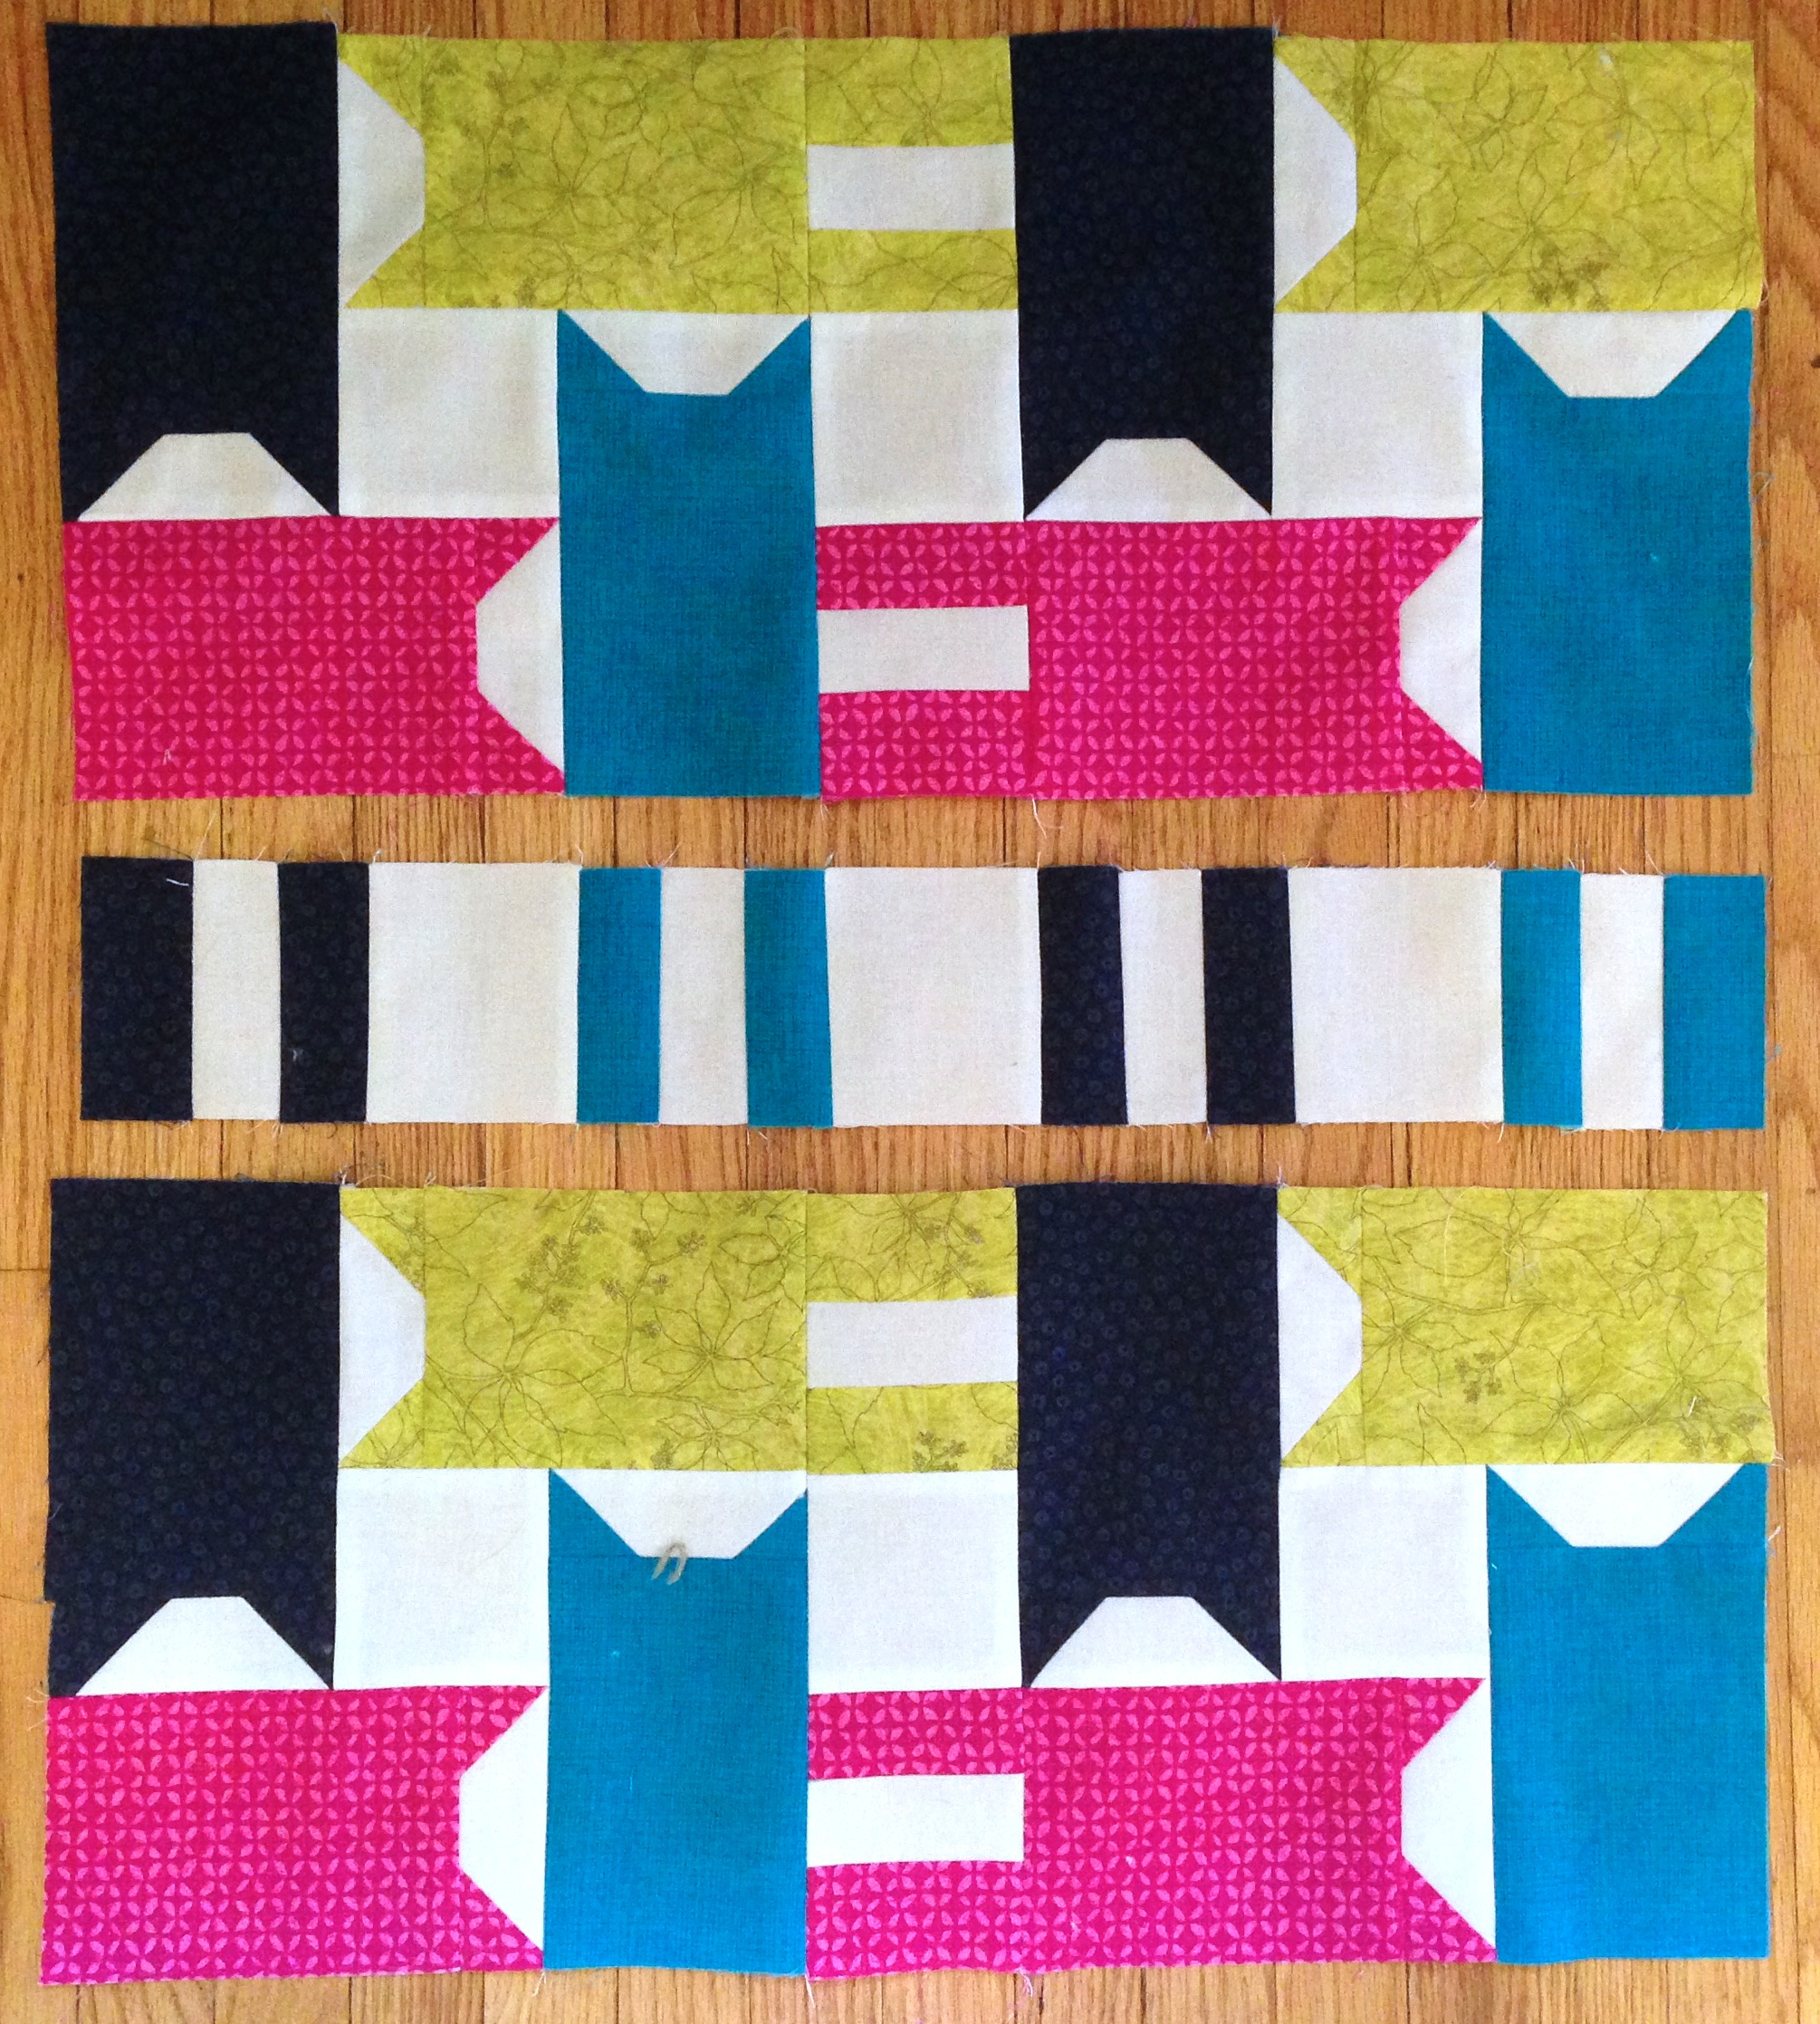
11″ Block for Full Quilt
The 11″ unit will go together like the larger 24″, but you will include extra leg units that will match up to the blocks around it.

– You will need to plan out your color placement in advance, so you know which leg units to place on which block.

Above is 57″ x 68″ quilt. You would need to remove the extra legs from the left and bottom blocks and add a leg border to the top and right side.
Enjoy the tutorial and show me what you make!
Hi Janice! This looks fantastic! Thank you for the tutorial! I’m looking for to make a baby quilt like this! I’m so happy to hear the pattern selling goes so well and wish good luck still for the next week! x Teje
Thank you so much for reminding me about the pattern purchase, and for the tutorial. I purchased a pattern, and now I can make the kitties, too!
Hugs!
Thank you so much!
What a fun block to make. Thanks for taking the time to share the tutorial. Thinking I might bookmark this for some Christmas present sewing!
Thanks so much for sharing this tutorial! I played with it in EQ on a more uniform grid, but like yours better. Older quilt patterns can have a lot of charm.
Hello! I thought I would let you know I tweaked this a little bit so it didn’t need partial seams. I thought I would share with you 🙂
http://sewgreenm.blogspot.com/2014/11/kitties-block.html
Thank you so much.
Oh! Wow! Thank you “sew” much!!!
Thanks for sharing. <3 I have a granddaughter who loves cats. This will be for her.
This is absolutely awesome!!!! Thank you for sharing!
Hi Janice!
One question> Here :
Cut 31 rectangles 1-1/2″ x 3″ (cat legs- 2 per cat)
Isn’t it 32 rectangles too?
Thank you. Hugs
Claudia (from Brazil)
I cherished as much as you’ll obtain carried out proper here.
The sketch is attractive, your authored subject matter stylish.
nevertheless, you command get bought an nervousness over that
you want be handing over the following. ill no doubt come more
previously once more since exactly the same just about a lot
ceaselessly within case you shield this hike.